7 Arduino LCD display tips and tricks
Содержание
- 1. Buffer the Arduino LCD Display
- 2. Refresh the entire screen every time you change something
- 3. Using sprintf() to clear a character lcd
- 4. How to print floats on an LCD
- 5. I2C, use Fast LiquidCrystal
- 6. Reversed Row and Column
- 7. Don’t forget the f() macro
- Conclusion
- 18 thoughts on “ 7 Arduino LCD display tips and tricks ”
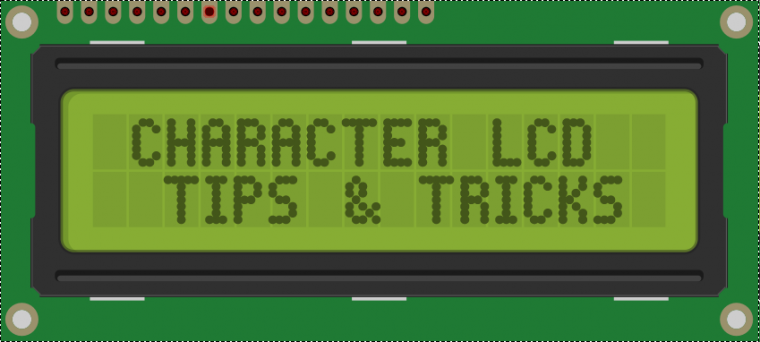
When I started working on Open Vapors, I thought the stumbling point would be the PID algorithm or safe AC line control. However, it turned out; I spent a significant amount of time understanding how to print to the Arduino LCD display correctly.

Grove Character LCD with RGB Backlight
If you need an easy to use RGB LCD, check out the Grove LCD from SeeedStudio. They sent me one to check out. The LCD comes with Seeed’s “grove connector system” which can connect to a variety of their Arduino-compatible boards. You can also pick up the Grove Base Shield which adds a variety of Grove connectors to an Arduino Uno. The Grove LCD makes it super easy to connect up a character LCD. It is very plug-and-play.
As I dig into my latest project, the lessons I learned back then are coming back to me. Here are 7 tips for driving an Arduino LCD display, like one with 2×20 or 4×20 characters.
1. Buffer the Arduino LCD Display
One approach I see many people try with a character LCD is letting their code directly print to the display. Using a simple buffer might look like it adds unnecessary complexity. One positive point is that you get a more predictable behavior. A trade-off is that you do need to use up a few more bytes of RAM. So, how do you implement a buffer?
First, declare some character arrays. Depending on your application, it might make sense to use a multi-dimensional array. If not, I find it more straightforward to have individual arrays for each line. For example, I might declare “line0” and “line1” each with 21 characters. (Remember, you should always have an extra character for the null terminator.)
Modify the buffer when your code needs to make a change on the Arduino LCD display. Modify the character array, aka string, variable.
Lastly, use a separate function to lcd.print() each line. Then in your loop() call the subroutine to update the screen. If you have some code, like a large for-loop or a lot of floating point math, you can also call the update display function there. That way the screen stays responsive.
2. Refresh the entire screen every time you change something
The display flickers if it is cleared then re-printed. An I2C serial backpack makes the flicker worse. SPI and UART fare a little better, but there is still some latency.
An alternative is never clear the screen. Just keep re-writing regardless if anything changes. So instead of trying to change one character at a time, print an entire line. The line printing approach works great if you are using a buffer and the print code from above.
This approach does have a minor issue though. Some people misinterpret a bug as something wrong with the display. Let’s look at an example that shows this problem, and another way to modify the buffers.
3. Using sprintf() to clear a character lcd
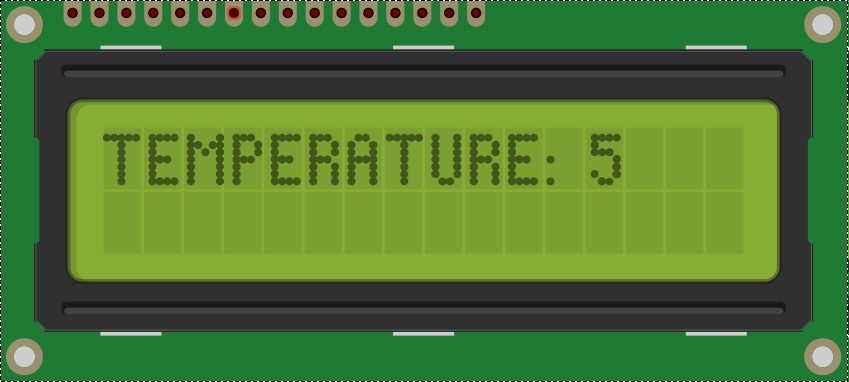
Pretend we built a temperature logger that prints the current temperature to the character display. While debugging, we keep seeing characters getting left behind or the temperature is displayed wrong.
The code prints “Temperature: 5”.
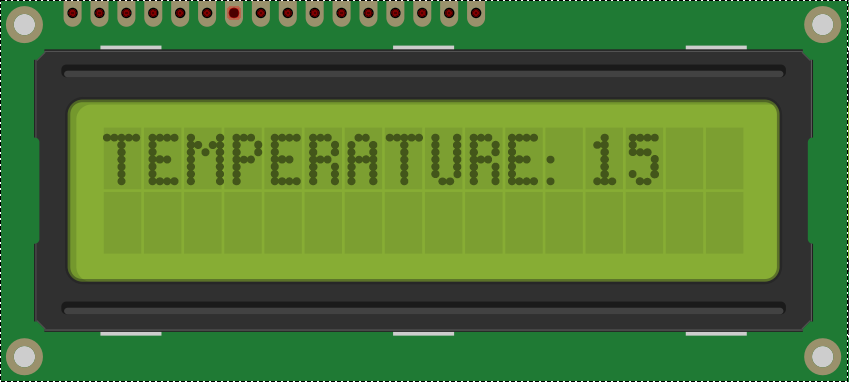
Then at some point, it gets slightly warmer, so the LCD now shows
“Temperature: 15.”
Later in the day, it cools off, and now your display is showing
“Temperature: 85”.
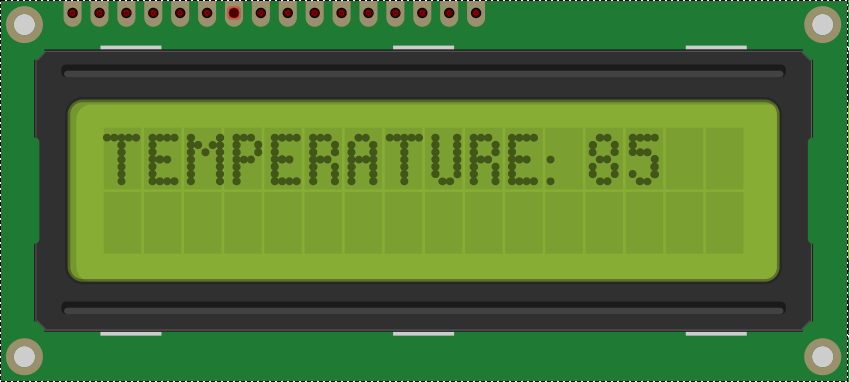
Wait a minute. 85 isn’t colder than 15! And in this case, it did not matter if we displayed in Celsius, Fahrenheit, or Kelvin.
So, what happened? Only the characters that get updated are being, well, updated. The extra “5” is from printing “15.” Nothing is clearing that block on the LCD.
So there are two options here. Clear the display EVERY TIME you go to print to the screen or print blank characters any place that should be blank. The second method is called “padding.”
I would recommend the padding approach for two reasons:
- Deterministic Behavior. I prefer operations like screen drawing to always take the same amount of time. Otherwise, you could run into hard to track down timing bugs. So on a 20 character wide display, I always print 20 characters. (Although, I may not print all of the lines at the same time.)
- Flickering. The act of clearing the display and then re-printing it could lead to flickering characters. This action is similar to pulse width modulating a LED. And the same limitation applies there. If the flashing is slow enough, human eyes will see it as flashing.
Using sprintf() isn’t difficult, but it does require the use of a buffer. (Sound familiar?) Here I will show you how to use sprintf(). As the name suggests, sprintf() is similar to printf(). If you have never used C’s printf(), check out this explanation for all of its parameters.
In this case, I picked the value 7, since “Temperature: ” takes up 14 spaces of the 20 space display. Adjust that amount as necessary in your code.
4. How to print floats on an LCD
You might have noticed in my example above; I used integers for temperature. There is a reason: sprintf() does not support floats. Well, more correctly, avr-libc’s implementation does not support floats without a compiler flag. An easy workaround is a function called dtostrf(). (This function appears to be unique to avr-libc.)
It takes a double, or float, and converts it into an ASCII string. We can then include this string in the sprintf() call.
5. I2C, use Fast LiquidCrystal
It has been a long time since I wrote the code for Open Vapors. However, I do remember at the time there was a “Fast LiquidCrystal” library. It optimized driving character displays over I2C. The before and after with the library was unbelievable. While still not as fast as directly driving the parallel interface, it was pretty close.
I only mention the age because lots can happen with libraries. If the update rate for your display seems slow, check to see if there is a more optimized library available to drive it.
6. Reversed Row and Column
Maybe this issue is just me, but it seems like row and column are reversed for the LCD commands. To select a cursor location set the column, then the row. Like: lcd.setCursor(2,1). That is the third column on the second row AND NOT the second column on the third row. (Rows and columns are 0-based, fyi).

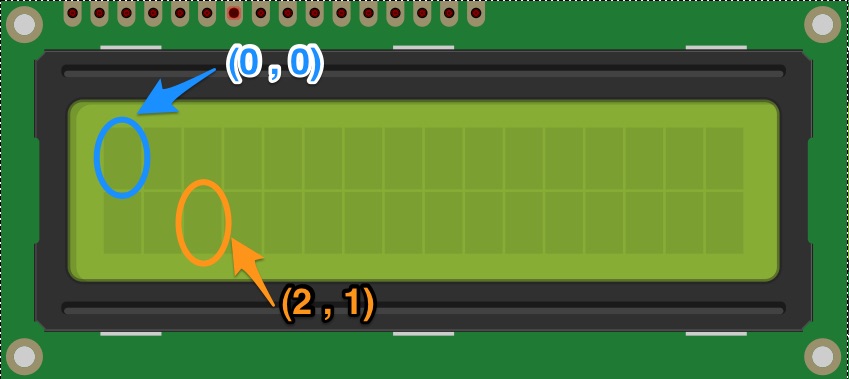
I have no amazing wisdom bits. It is just a matter of RTFM.
7. Don’t forget the f() macro
Just like debugging with Serial.print(), using lcd.print() can waste RAM. Wrap all strings inside of the famous F() macro. If you have not used it before, you can see my F() macro explanation here. In short, make sure statements that look like this:
Are changed to look like this:
Conclusion
These are my tips, so now it is your turn. What tips have you used when driving an Arduino LCD display?

Long comments, URLs, and code tend to get flagged for spam moderation. No need to resubmit.
ALL comments submitted with fake or throw-away services are deleted, regardless of content.
Don’t be a dweeb.
Leave a comment Cancel reply
18 thoughts on “ 7 Arduino LCD display tips and tricks ”
Hi James, thanks for the above explanations
I am using if, else statements in arduino IDE to display different information when an input push button is High or Low but I encounter a mixture of displays on the lcd whenever I change the state of the push button. I altered the lcd.clear() function in numerous positions but still not working. Please I need your assistance. Thanks
As another note, can you go into more detail about the padding of sprintf? Specifically what the s/d and number mean?
They are the place holders for “string” and “decimal number (integer.)” It is the same place holders used by printf().
Hi James, This is THE BEST LCD buffer tutorial I’ve followed, and have it working well. I have a question regarding custom characters. Is it possible to have custom characters generated already inserted into a buffer line?
For example: I have a special buffer declared as follows:
byte partFillBoxChar[8] = <
0b11111,
0b10001,
0b10001,
0b11111,
0b11111,
0b11111,
0b11111,
0b00000
>;
lcd.createChar(0, partFillBoxChar);
And usually do a lcd.write((uint8_t)0); to print that character.
Is there a way to print that special character “within” a buffer line?
Please let me know if I didn’t give enough information specific to the issue. Thank you again for a great tutorial!
-Jonathan
You might want to look at the Arduino function bitRead(). It lets you specify a bit from a variable (or constant).
Very interesting .. But, Where did you find that it was called padding?
Uh? About 30 years ago when I learned about it.
Hi,
I am new enough to coding and am currently doing a mini project where i am to display readings from a BME680 sensor onto a 2 X 16 LCD screen, I have the sensor working and it displays onto the serial monitor just fine. When i switched the Serial lcd the readings becam jumbled up. i tryed to setCursor before and after using the following:
The problem is when it displays onto the lcd screen the first line says ” Temperature 23.1 ” and the Second line says ” = *C ”
How do i get the figure 23.1 onto the second line?
lcd.setCursor(0,1); // first position on the second line
After filling the first line (16 Characters) the next character does not follow on the second line. You need to set the position (line and character position) to write to a new line.
Interesting, I have also copied or change some of the Serial functions to LCD steps like Serial.println(); to lcd.println();
Take note that the library for LiquidCrystal only list a print() function, not a println() function and if you do use println() with an LCD you will get two characters with 4 horizontal lines after your text.
Took me a while to realize that I should not use lcd.println() like with your lcd.println(” = *C”); line will give you the two funny characters as the LCD do not handle the return character and new line character.
I have a wisdom bit for the reversed row and column. The (2, 1) is an (x, y) coordinate respectively. Thanks for sharing your experience.
How about line wrapping function. Sometimes I have incoming messages sent to the display for diagnostics. And if the text is longer than a line the text will end up not on the next line but the one following. It would be great to have an easy way to write long text displayed sequentially.
I typically use a 20×4 display.
Ahhhhh crap… I followed a link to this page thinking it had an answer to this very problem….. oh well…..
Wow, I had seen this in code before and wondered what it was about. Now i have spent a few evenings trying to figure out why the LCD code that had worked for weeks was stopping. Now this sheds light on what is happening.
I am going to add this macro and give it a go on the test bench.
I am grateful for all your posts, but this was a real time saver and a great learning experience.
Many thanks!
Bob D
Hi James,
To follow up with my initial comment, I have found even after adding the f() macro to my code the issue that i encountered is a 2×16 LCD that appears corrupt. The right half of the display will just show all all the dots on, and the left side will show my text as programmed. Trying several resets will at times change things, but I never get a proper text on the LCD.
I switched to another 2×16 LCD and all appears normal. This is with the f() macro written in my code as well.
I am going to search the web now to see if I can find anything more about the display issue.
Happy Holidays and thank you again; i look forward to your posts!
Bob D
Without seeing the code, I can’t suggest a reason for the issue. However the F() macro is probably not the cause. It might be helping illustrate the issue, but it isn’t the issue itself.
Hi James,
What format do I need to post the arduino code ? I also have the schematic I can send along.
There are many comments in the arduino code that will help explain the operation of the display.
Looking closer at the code I decided to take out the bedFMStatus(); in the loop as device is not connected at this time. This could also be a clue to a write issue to the LCD as I was not sure how to update the LCD and source counter from the 2nd location.
-the bedroom plate is 3 buttons only and the unique button bedSelect will jump to FM UP which is the Si4703 FM tuner and FAVS will select the preset stations.
I know without the code and schematic this doesn’t make any sense, but it is the next thing to explore to see if it is causing any of the garbled display issues.
Any help is greatly appreciated,
Bob D
I’d suggest posting the code to something like https://gist.github.com. It’ll keep the formatting intact. For schematics, I tend to upload them to imgur. Both make it easy to share on a forum as well.

Most Popular Posts
- MQTT Tutorial for Raspberry Pi, Arduino, and ESP8266
 millis() Tutorial: Arduino Multitasking
- P-Channel MOSFET Tutorial with only Positive Voltages
- The 4 best transistors to keep in your parts kit
- />MSGEQ7 Simple Spectrum Analyzer
- />Arduino: How do you reset millis() ?
- Low side vs. High side transistor switch
- 5 Myths Everyone Believes about Arduino (that aren’t true)
- Arduino: Independent On-Off Times with Millis()
Follow James
Most Recent Posts
- />MC1377 Measurements on Mini Apple IIe Prototype video board
- Introducing Bit Preserve
Источник:


