


Using the Hitachi HD44780 with the Arduino
Содержание
- Hitachi HD44780 4 bit mode
- Connections to the Hitachi HD44780 in 4 bit mode.
- Photo of Arduino Connections
- Software Library and versions
- Arduino IDE Version
- Hitachi HD44780 Liquid Crystal Library
- Hitachi HD44780 Example 1 : 4bit parallel mode
- Hitachi HD44780 Common LiquidCrystal Commands
- Hitachi HD44780 LiquidCrystal Commands
- Arduino Code Operation
- Hitachi HD44780 Example 2 : Time since last reset.
- Hitachi HD44780 Example 3 : Custom Character bar
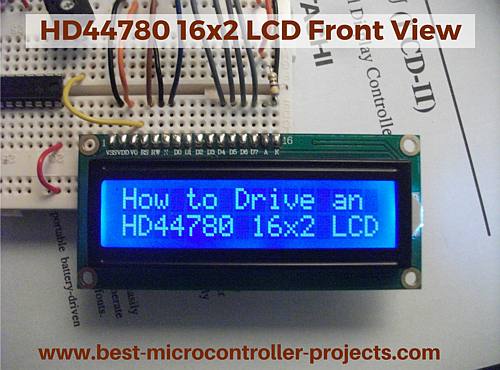
The Hitachi HD44780 is an LCD driving chipset usually driving a 2 line by 16 character display. You can get many different screen sizes e.g. 16×4, 20×4, 80×1. Regardless of that, the chipset, and hence the driving software remains the same.
These type of displays are very low cost and can display any ASCII text that you want. In addition you can also generate your own characters. Using these it is possible to create a simple bar graph to display a graphical representation of voltage etc.
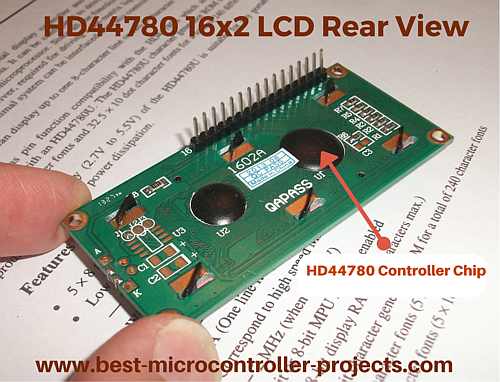
The rear view of a Hitachi HD44780 module:
Hitachi HD44780 4 bit mode
The HD44780 is capable of operating in 8 bit mode i.e. faster (but see below), but that means you need 11 microcontroller pins. It is a trade off between speed and number of microcontroller pins you have available. In fact speed is not really that important as the amount of data needed to drive the display is low and the timing of the HD44780 interface means there are lots of 37us delays needed anyway (after a command is written). The liquidCrystal library uses 100us to be on the safe side. Note One command: clear display takes 2ms.
The 4 bit mode is more appropriate for microcontrollers since you only need about 6 pins. Inside the HD44780 you still have 8 bit operation so for 4 bit mode you do two writes to get that 8 bit quantity inside the chip.
Connections to the Hitachi HD44780 in 4 bit mode.
- RS — register select (Selects the data or instruction register inside the HD44780).
- E — enable (This loads the data into the HD44780) — on the falling edge.
- D4 — Part of upper nibble used in 4 bit mode.
- D5 — Part of upper nibble used in 4 bit mode.
- D6 — Part of upper nibble used in 4 bit mode.
- D7 — Part of upper nibble used in 4 bit mode.
- There is also a 10k pot across the supply and connected to Vo of the LCD.
- The backlight led has a 470R resistor connected to 5V and to pin A of the LCD.
- Pin K of the LCD is connected to GND.
- Add a decoupling capacitor across Vcc and GND (not shown in photos).
Photo of Arduino Connections
The following picture shows the HD44780 display connections operating in 4 bit mode:
Software Library and versions
Arduino IDE Version
Hitachi HD44780 Liquid Crystal Library
The library used here is LquidCrystal 1.01 — you can easily install it from the Arduino IDE.
If you do not see the library as an entry when you click the menus:
Then select manage libraries :
Sketch—>Include Library —>Manage Libraries.
Search for and install LiquidCrystal using the "Filter Your Search" form.
Hitachi HD44780 Example 1 : 4bit parallel mode
This is a simple example. Note how the main loop has no code since we only want to initialise and display the text without doing anything else.

Hitachi HD44780 Common LiquidCrystal Commands
The Hitachi HD44780 has many commands, Here are the most useful: initialisation, xy location setting and print:
Class instantiation intialisation
LiquidCryslal object> (pins. )
This instantiation process also intialises the pins in use
Public class functions
begin(16,2)
Tell the software what display you have — must be called before other commands.
setCursor(x,y)
print(data[ ,base]) — [] optional
This is an overloaded function that can print any of the three number types or a string. If you use a number char,byte,int or long) you can also choose which base it is converted into using three letter acronyms, BIN, DEC, OCT, or HEX.
One other function that is useful is the user generated character function:
createChar(uint8_t addr, uint8_t data[]);
This defines the data for use as user generated character.
Object Instantiation and function use
An object is created using the main class constructor (in this case LiquidCrystal) as follows (here the object created is labeled lcd):
LiquidCrystal lcd( LCD_RS, LCD_E, LCD_D4, LCD_D5, LCD_D6, LCD_D7);
Note: This is also used to initialise internal data structures with the pins in use.
Once created, you can access the class library functions with the instantiated object (lcd) followed by a period and then the public class function: So, to print out some text for the lcd object (above)you would type:
lcd.print("My text");
As noted above this function is overloaded to allow number output:
lcd.print((char)35,BIN);
Hitachi HD44780 LiquidCrystal Commands
Here’s a full list of the LiquidCrystal public library commands for the Hitachi HD44780 :
Arduino Code Operation
While reviewing the operation of the LCD code I found this interesting snippet:
- pin mode setting.
- data manipulation to output.
First of all the pin mode is set every time that a write is made to the LCD. This would ensure that if other code accidentally set the pin direction wrongly then this would override it. Usually a port is dedicated to one operation so pin modes should be set in the "setup" routine. The way it is done here is "safe" but gives a big performance hit at each LCDwrite operation.
Secondly to manipulate each data bit to direct it to the output takes a few operations involving selecting the pin and then shifting the value right. It’s clever and works in all cases but again there is a performance hit. By using the hardware in a straight forward way then you can avoid this coding i.e. use the lower 4 bits of an output port and and you only need a few bit manipulation operations: a lower four bit and mask:
port_val &= 0xf0; // Clear the lower bits
port_val |= low_nibble & 0x0f; // Setup the low output nibble
op_port = port_val; // Send the new data to the port.
For Arduino operation, performance is not as important as speed and ease of coding and it allows users to mix and match code to get it working but you should be aware that underneath all the magic there can be a lot going on and you could re-write it (or re-wire the hardware) for better performance.
Hitachi HD44780 Example 2 : Time since last reset.
The following example uses the print command to continuously output an updated time display every 99ms.
Hitachi HD44780 Example 3 : Custom Character bar
The user defined characters will be updated to give a graphical display — a moving bar that represents increments of 1/4 of a second. You could represent any analogue quantity with this code.
Each character is 5 pixels wide and there are 16 characters to a row so there are a total of 16×5 = 80 pixels across the display. You can use this information to display a horizontal bar graph.
Note: You can use as many column pixels as you want as the bar drawing routine uses x,y (LCD coordinates) to start from, and then just a number representing the number of pixels to draw to the right.
Источник: