


Debian GNU/Linux 7.0 Code Name “Wheezy” Server Installation Guide
The Debian Project was founded in 1993 by Ian Murdock. Debian Linux is one of the most popular and freely available Operating System developed by Debian Developers around the world. They are involved with various activities viz. maintaining software repositories, graphic design, legal analysis, software licenses, documentation, web ftp site administration etc. Debian supports several Desktop Environment like GNOME, KDE Plasma Desktop and Applications, Xfce, and LXDE. Debian is available in 70 languages, and supporting a huge range of computer types.
The project team proudly released Debian 7.0 version (code name “Wheezy“) on 04 May 2013.
What’s New in Debian 7.0
This latest version has updated software packages as:
- Apache 2.2.22
- Asterisk 1.8.13.1
- GIMP 2.8.2
- GNOME 3.4
- Icedove 10
- Iceweasel 10
- KDE Plasma Workspaces and KDE Applications 4.8.4
- kFreeBSD kernel 8.3 and 9.0
- LibreOffice 3.5.4
- Linux 3.2
- MySQL 5.5.30
- Nagios 3.4.1
- OpenJDK 6b27 and 7u3
- Perl 5.14.2
- Ceph 0.56.4
- PHP 5.4.4
- PostgreSQL 9.1
- Python 2.7.3 and 3.2.3
- Samba 3.6.6
- Tomcat 6.0.35 and 7.0.28
- Xen Hypervisor 4.1.4
You may visit to download Debian 7.0 Wheezy CD/DVD Iso Images.
Installation of Debian GNU/Linux 7.0 Server Code Name “Wheezy”
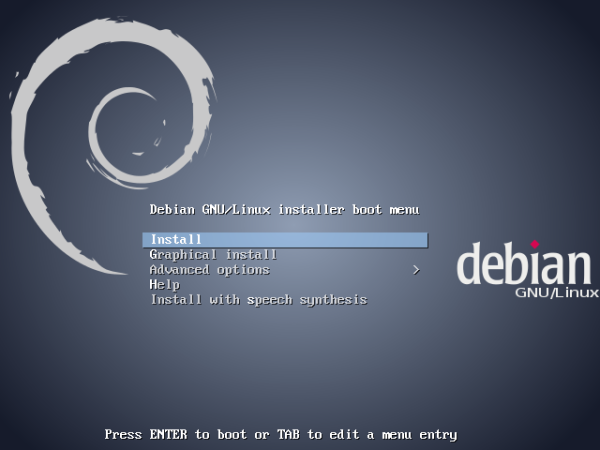
1. Boot Computer with Debian 7.0 Server Installation CD/DVD or ISO. Select Install for text based installation. Choose Graphical Install to install in Graphical mode.
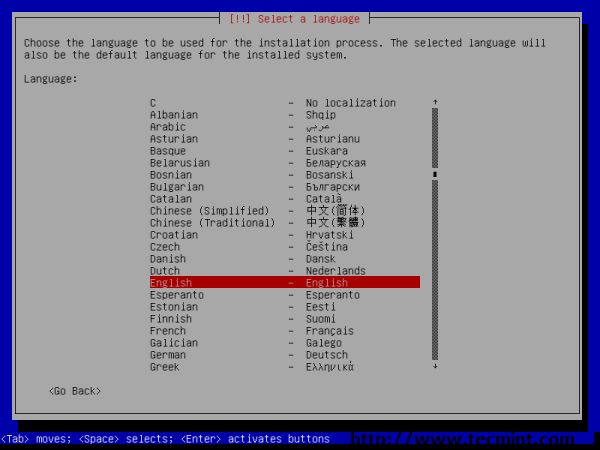
2. Language Selection.
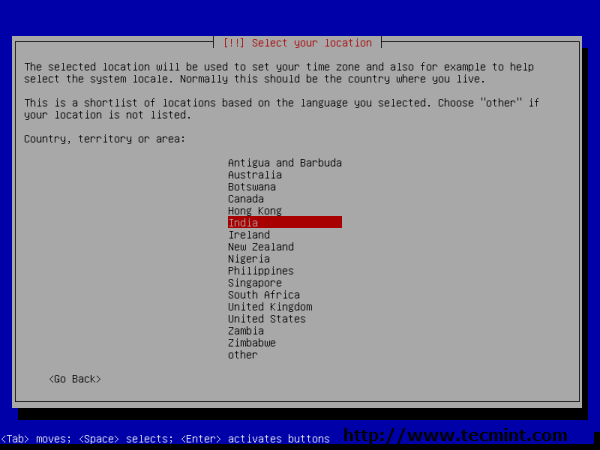
3. Select your location.
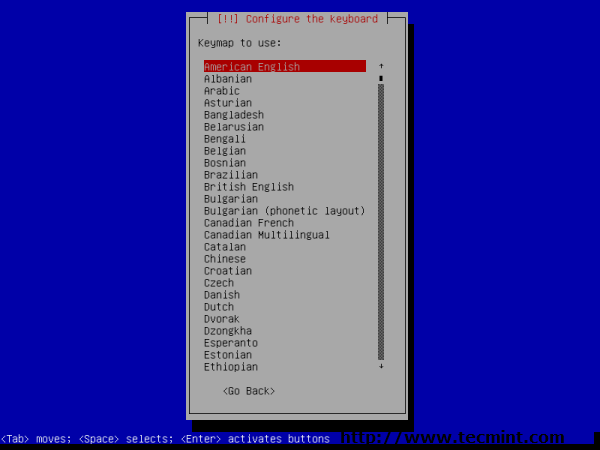
4. Keyboard layout selection.
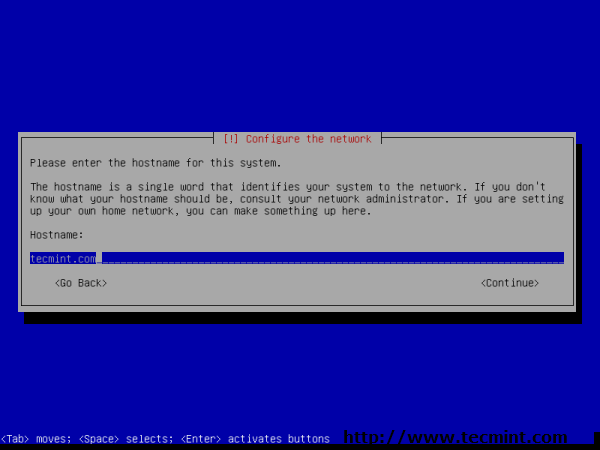
5. Enter Host Name.
6. Setup root user and password.

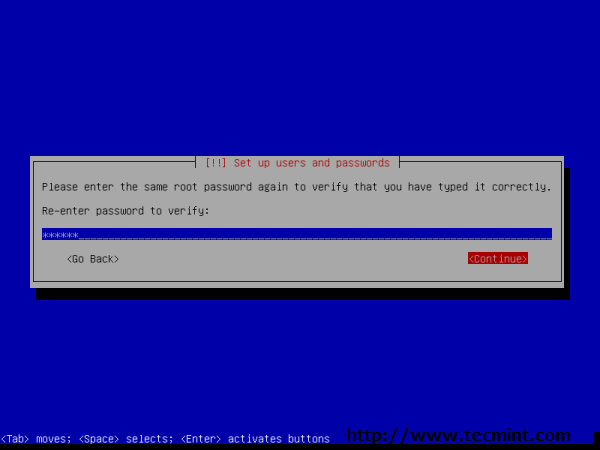
7. Re-enter root password to verify.
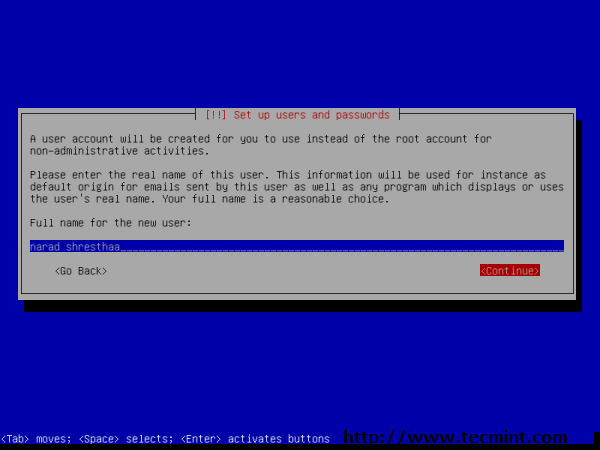
8. Non-administrative user full name.
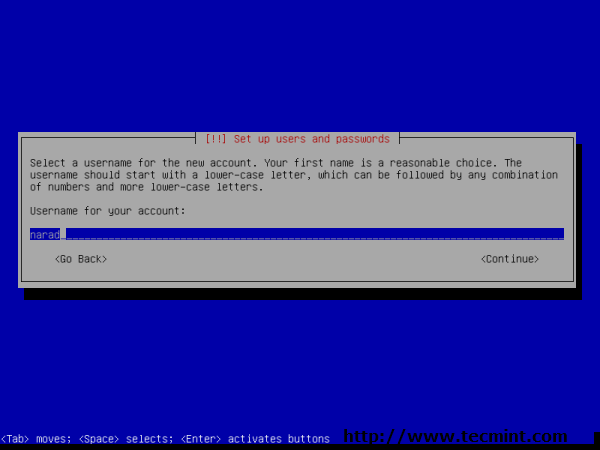
9. Create Non-administrative user account. Don’t use admin user as it’s reserved on Debian Wheezy.
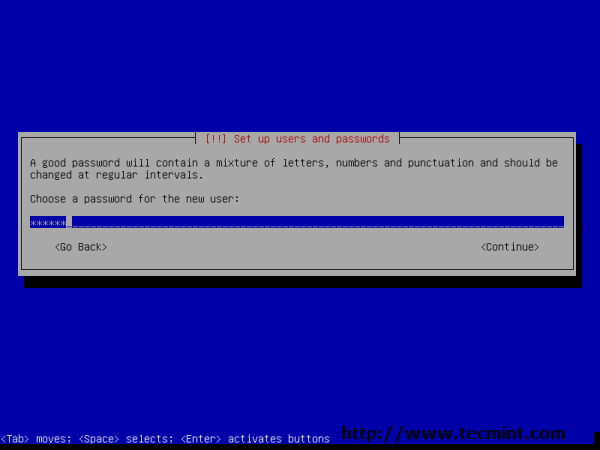
10. Non-administrative user password.
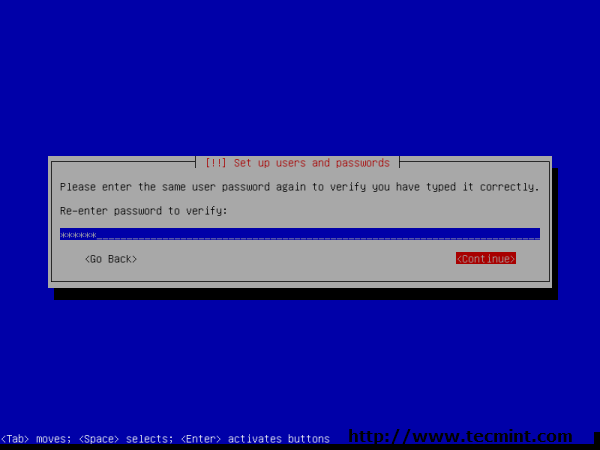
11. Re-enter non-administrative user password to verify.

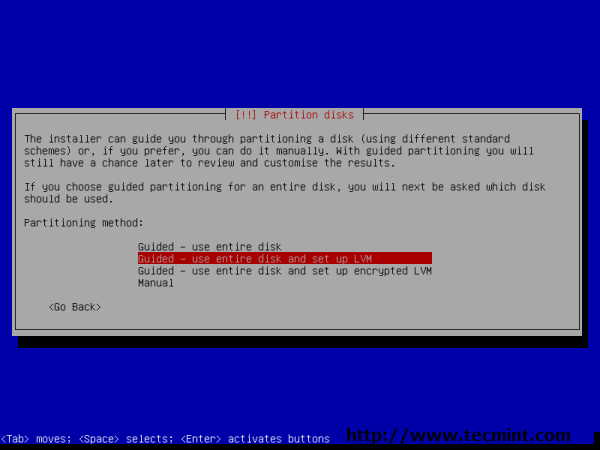
12. Disk Partitions. I used partitioning method “Guided use entire disk and set up LVM, which will create partitions for me automatically.”
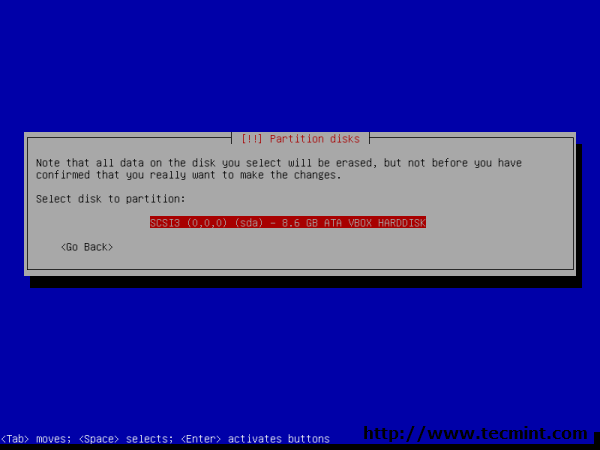
13. Select disk to partition.
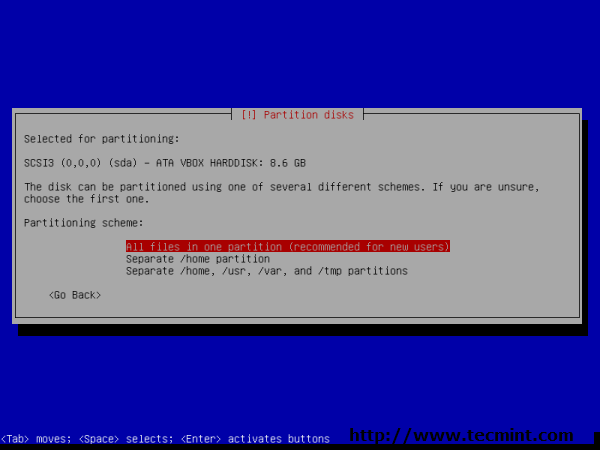
14. Select partitioning scheme.
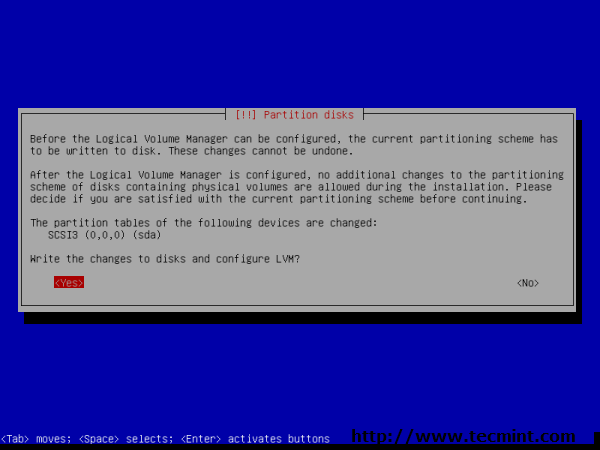
15. Write changes to disk. Press ‘Yes‘ to continue.
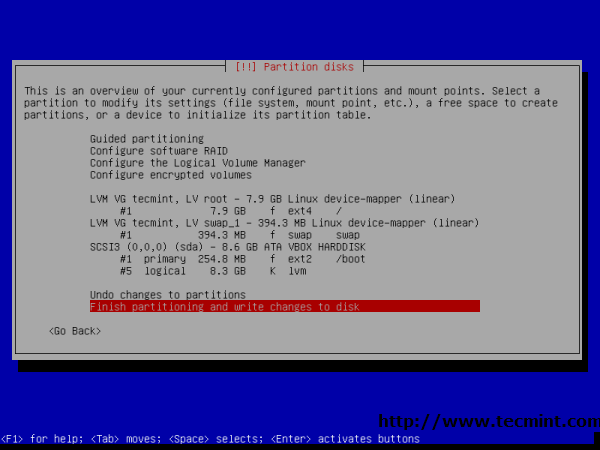
16. When your are happy with partitioning, select ‘finish partitioning and write changes to disk.’
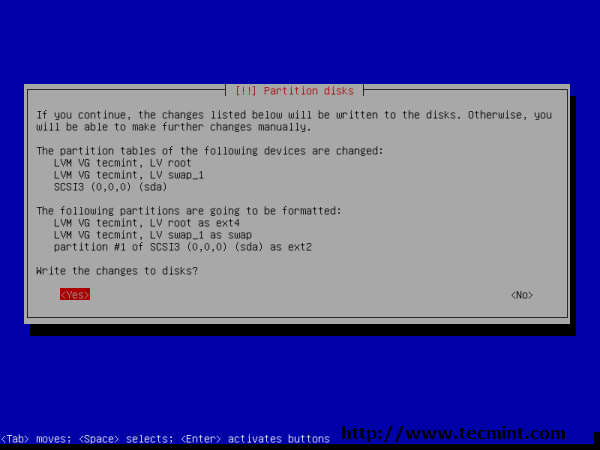
17. Press ‘Yes’ to write changes to Disk.
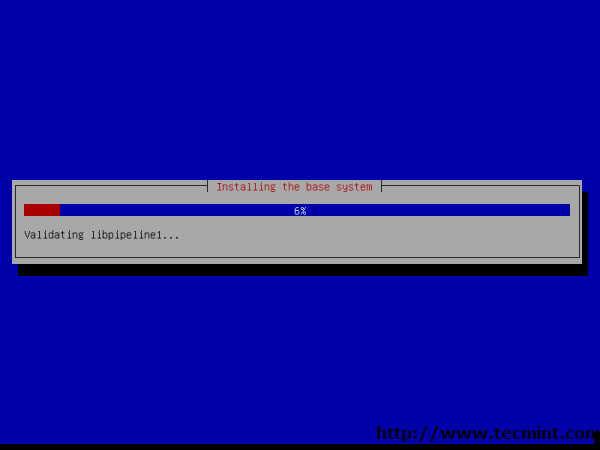
18. Afterwards, installing the base system.
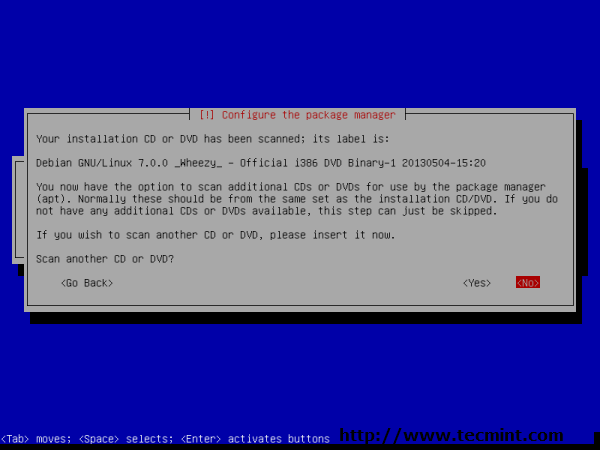
19. Installation CD/DVD verification. Press ‘No‘ to skip scanning other installation media.
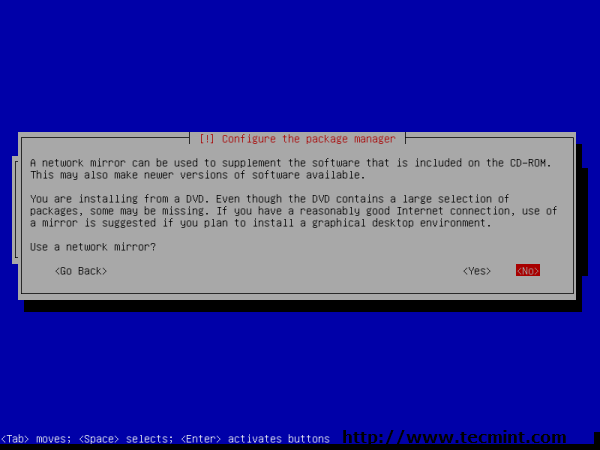
20. Configure the package manager. Selected ‘No‘ as i am installing through media.
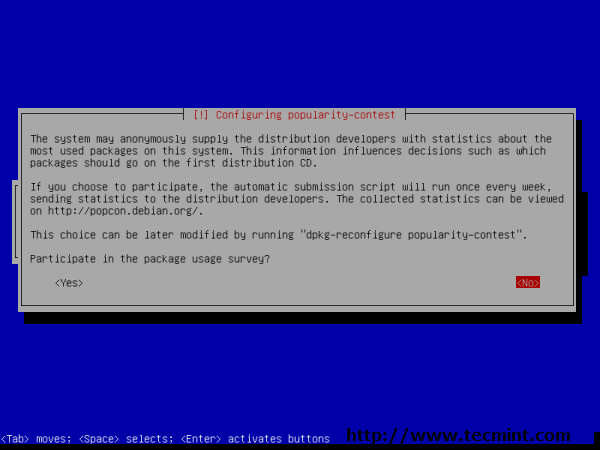
21. You may skip Package usage survey.
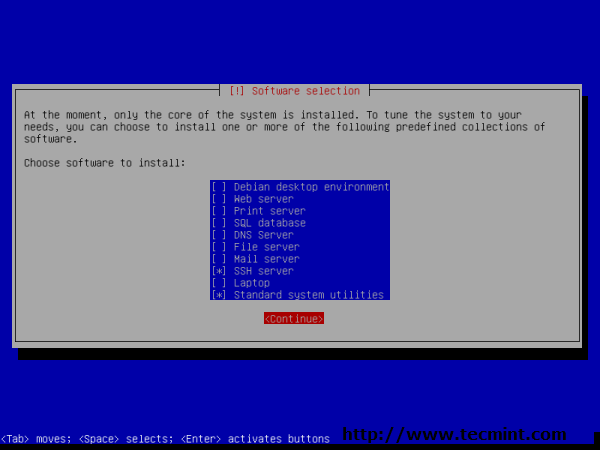
22. Software selection, select packages as per your need. You can install the required packages manually later on.
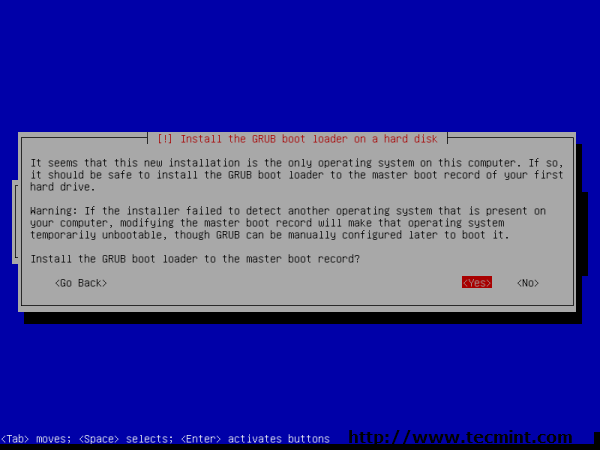
23. Installing GRUB Bootloader in MBR.
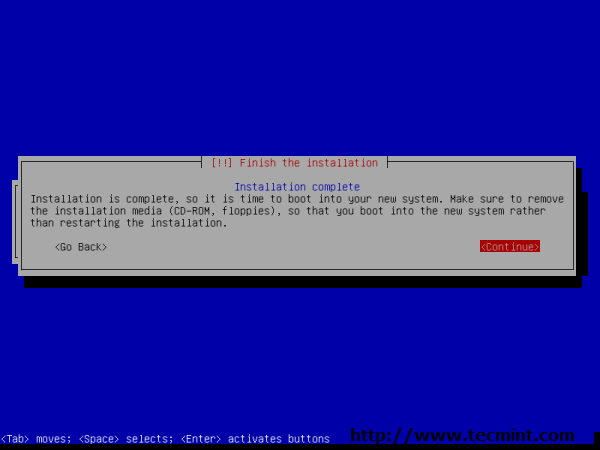
24. Installation completed. eject CD/DVD and reboot system.
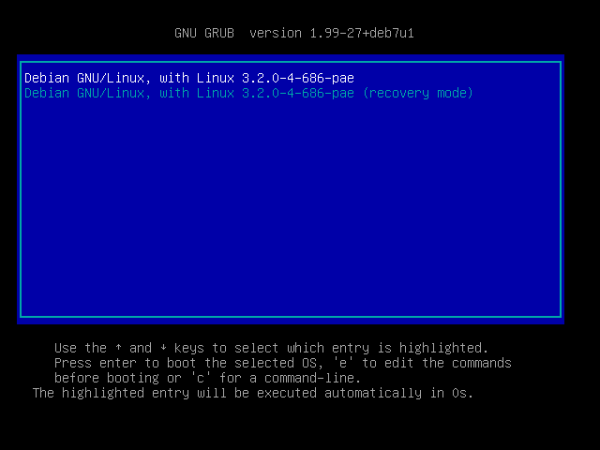
25. Debian GNU/Linux 7.0 GRUB booting options.
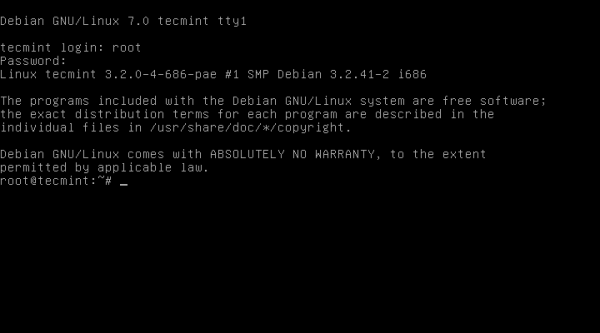
26. Debian GNU/Linux 7.0 command prompt.
Please visit to know more about Debian release notes.
If You Appreciate What We Do Here On TecMint, You Should Consider:
TecMint is the fastest growing and most trusted community site for any kind of Linux Articles, Guides and Books on the web. Millions of people visit TecMint! to search or browse the thousands of published articles available FREELY to all.
If you like what you are reading, please consider buying us a coffee ( or 2 ) as a token of appreciation.
Источник: