


ST STM32F4xx ARM Cortex-M4F DemoUsing IAR EWARM development tools [RTOS Ports]
Содержание
- Source Code Organisation
- The STMicro ARM Cortex-M4F Demo Application
- RTOS Configuration and Usage Details
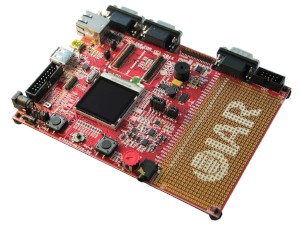
STM32F407ZG_SK starter kit board
This page documents a FreeRTOS ARM Cortex-M4F demo application that targets an STMicroelectronics STM32F4xx microcontroller. An IAR project is provided that is pre-configured to run on the development board provided as part of the STM32F407ZG-SK starter kit.
The FreeRTOS ARM Cortex-M4F port supports a full interrupt nesting model, and never completely disable interrupts. The port can only be used with hardware floating point support turned on in the compile time options of the project used to build the source files. ARM Cortex-M4 devices that don’t include a floating point unit should not use this port, but instead use the FreeRTOS ARM Cortex-M3 port layer.
Note: The demo presented on this page tests the FreeRTOS floating point support by forcing interrupts that use the floating point unit to nest to a level of three deep. The nesting starts from the tick hook function — which is called from the FreeRTOS tick interrupt code. Removing this part of the test will greatly improve the efficiency of the RTOS kernel, and can be achieved by setting configUSE_TICK_HOOK to zero in FreeRTOSConfig.h.
Note 2: If this project fails to build then it is likely the version of IAR Embedded Workbench being used is too old. If this is the case, then it is also likely that the project file has been (silently) corrupted and will need to be restored to its original state before it can be built even with an updated IAR version.
IMPORTANT! Notes on using the FreeRTOS IAR STM32F4 demo project
Source Code Organisation
The IAR Embedded Workbench workspace for the STM32F4xx demo is called RTOSDemo.eww, and is located in the FreeRTOS/Demo/CORTEX_M4F_STM32F407ZG-SK directory of the official FreeRTOS .zip file download.
The STMicro ARM Cortex-M4F Demo Application
Functionality
- Floating point instructions being used from tasks.
- Floating point instructions being used from interrupts that nest 3 deep. Note: The nesting starts from the tick hook function — which is called from the FreeRTOS tick interrupt code. Removing this part of the test will greatly improve the efficiency of the RTOS kernel, and can be achieved by setting configUSE_TICK_HOOK to zero in FreeRTOSConfig.h.
- Software timers.
- Queues.
- Mutexes.
- Semaphores.
- Malloc failed, stack overflow, tick and idle hook functions.
Demo application tasks are split between standard demo tasks, and demo specific tasks. Standard demo tasks are used by all FreeRTOS ports and demo applications. They have no purpose other than to demonstrate the FreeRTOS API, and test a port.
It creates a lot of queues, a software timer, and different types of semaphore. The tasks consist mainly of the standard demo tasks.
The demo includes application specific "register test" tasks. These are idle priority tasks that start by filling all the generic and floating point registers with known values. The tasks then repeatedly check that each register maintains the value written to it, as it enters and exits the Running state, for the lifetime of the task. Each of the two register check tasks uses a different set of known values, and a value being unexpectedly changed is symptomatic of an error in the context switching mechanism.

The floating point interrupt nesting test starts in the tick hook function. The tick hook function is an optional application defined function that is called from the real time kernels tick interrupt if configUSE_TICK_HOOK is set to 1 in FreeRTOSConfig.h. The tick hook function fills the floating point registers with a known value, then forces a medium priority interrupt to interrupt it. The medium priority interrupt fills the floating point registers with a different value, before it too forces a high priority interrupt to interrupt it. The high priority interrupt fills the floating point registers with yet another value. As the interrupt nesting stack then unwinds, first the medium priority interrupt checks that the floating point registers contain the values that it wrote to them, and then the tick hook function (the lowest priority interrupt) checks that the floating point registers contain the values that it wrote to them.
A ‘check’ software timer is created and started to periodically inspects the standard demo tasks and register test tasks, to ensure they are all operating as expected, and have never reported an error. The check timer callback function toggles LED STAT4 to give visual feedback of the system status. If LED STAT4 toggles every 3 seconds, then the check software timer has not discovered any problems with the execution of the test and demo tasks. If the rate at which LED STAT4 toggles increases to every 200 milliseconds, then the check software timer has discovered a problem in at least one task.
Hardware set up
Building and executing the demo application
- Ensure the target hardware is connected to the host computer using a suitable debugger interface. A J-Link lite is provided in the starter kit.
RTOS Configuration and Usage Details
Cortex-M4F FreeRTOS port specific configuration
This sets the frequency of the RTOS tick interrupt. The supplied value of 1000Hz is useful for testing the RTOS kernel functionality but is faster than most applications require. Lowering this value will improve efficiency.
Attention please!: See the page dedicated to setting interrupt priorities on ARM Cortex-M devices. Remember that ARM Cortex-M cores use numerically low priority numbers to represent HIGH priority interrupts. This can seem counter-intuitive and is easy to forget! If you wish to assign an interrupt a low priority do NOT assign it a priority of 0 (or other low numeric value) as this will result in the interrupt actually having the highest priority in the system — and therefore potentially make your system crash if this priority is above configMAX_SYSCALL_INTERRUPT_PRIORITY. Also, do not leave interrupt priorities unassigned, as by default they will have a priority of 0 and therefore the highest priority possible.
The lowest priority on a ARM Cortex-M core is in fact 255 — however different Cortex-M vendors implement a different number of priority bits and supply library functions that expect priorities to be specified in different ways. For example, on STM32 microcontrollers the lowest priority you can specify is in fact 15 — this is defined by the constant configLIBRARY_LOWEST_INTERRUPT_PRIORITY in FreeRTOSConfig.h. The highest priority that can be assigned is always zero.
It is also recommended to ensure that all four priority bits are assigned as being preemption priority bits, and none as sub priority bits, as they are in the provided demo.
Each port #defines ‘BaseType_t’ to equal the most efficient data type for that processor. This port defines BaseType_t to be of type long.
Interrupt service routines
Note that portEND_SWITCHING_ISR() will leave interrupts enabled.
As an example, this demo provides an interrupt service routine called EXTI9_5_IRQHandler(), which is defined in main.c. This interrupt is triggered by pressing the button marked "USER" on the starter kit hardware. The interrupt uses a semaphore to synchronise with a task, and calls portEND_SWITCHING_ISR to ensure the interrupt returns directly to the task. The function is shown below:
Only FreeRTOS API functions that end in "FromISR" can be called from an interrupt service routine — and then only if the priority of the interrupt is less than or equal to that set by the configMAX_SYSCALL_INTERRUPT_PRIORITY configuration constant.
Источник: