


Programming STM32 using Standard Peripheral Library and free tools Part #1: A first example
8 bit and 32 bit microcontrollers are widely used in billions of electronic devices. Their development can be achieved by using free tools only. In this tutorial, I show you how to use the GNU tools (GCC / make) to develop firmware for a STM32 microcontroller in an Ubuntu environment.
We start with a basic example that uses the STMicroelectronics Standard Peripheral Library. This library provides several modules that can be used to program the STM32 peripherals like ADC, GPIO or SPI. This first example is about a blinking LED. It explains how to setup the project folder and the files that are required for the project. This also includes a working main.c and makefile.
The makefile is that part of the project that puts it all together the (third party) Standard Peripheral Library and your project files (main.c etc.). I use a simple project structure that results in a simple makefile. I also describe the makefile in detail, so the reader will be able to understand how it works and how to adjust it for his own needs.
This first part of this tutorial is about the development environment. It describes the installation of the Linux operating system. I use Ubuntu in the version 16.04, and I installed it in a VirtualBox.
Download
Here is the complete project Part #1: A first example available for download. Extract it to your Home folder, so that you get the following result:
The build environment
VirtulBox is a virtualization software and can be installed on all common operating systems. It supports the creation and management of guest virtual machines running versions and derivations of Windows, Linux and others.
There are several tutorials available on the internet. This is one of them.
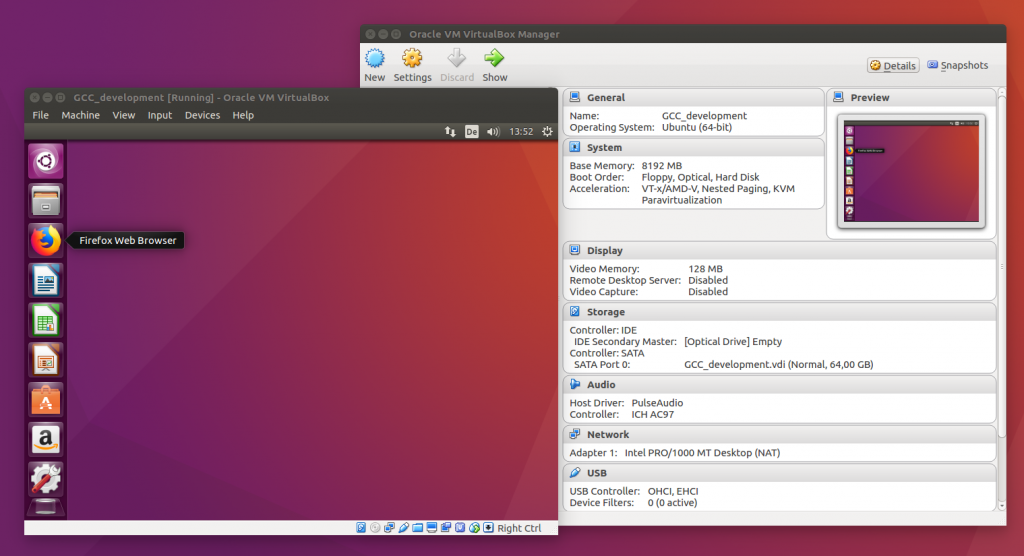 Ubuntu 16.04 running in VirtualBox
There are a view tools that we need for development. One of them is the GCC ARM embedded toolchain. In this tutorial, i chose version 7-2018-q2-update (Linux, 64 bit) from ARM’s website. There is a nice tutorial about how to install the toolchain that i will follow here.
NOTE: DO NOT INSTALL THE GCC ARM NONE EABI FROM UBUNTU REPOSITORY!
lib32ncurses5 is a prerequisite for the GCC ARM toolchain. Open a Terminal window and type in the following commands:
The toolchain will be installed locally in our Home folder. The following commands creates a sub-folder (/opt), moves to this folder and extracts the downloaded GCC ARM toolchain to it.
You can prove your build environment by typing
The result should look like this:
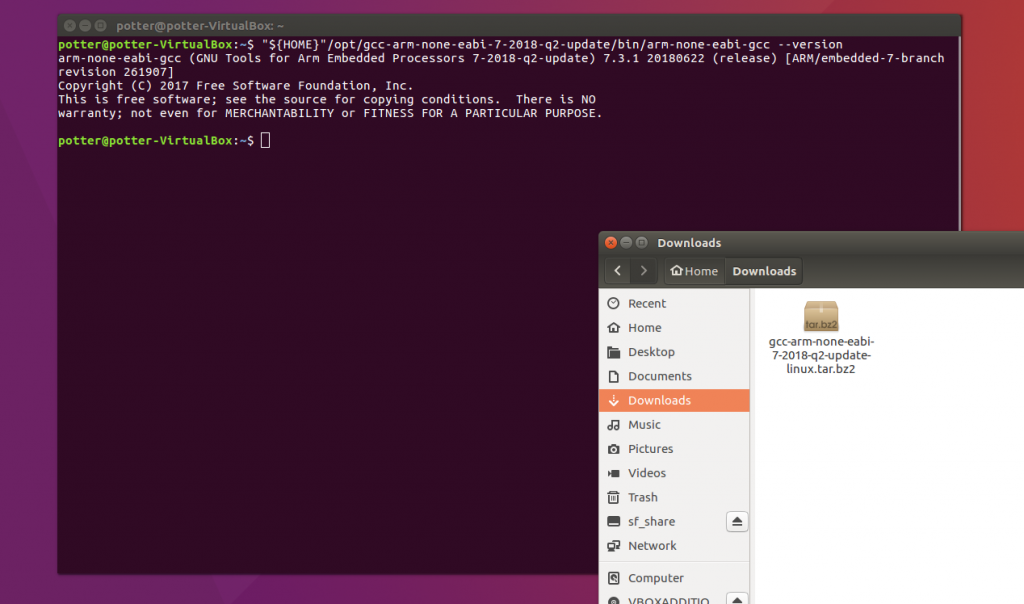 Validating the toolchain
Our toolchain is now up and running, so let’s move on to the first example project Blinky.
A first example Blinky
The first example project Blinky is based on the Standard Peripheral Library from STMicroelectronics. You can download it from here:
https://www.st.com/content/st_com/en/products/embedded-software/mcus-embedded-software/stm32-embedded-software/stm32-standard-peripheral-libraries.html
The Standard Peripheral Library includes the software modules for the STM32 peripherals like the real time clock control (RCC) or the general purpose IO’s (GPIO). It eases much of the life of a STM32 developer, and so I also use it as a base.
Every project that is build for STM32 requires some special files (and functions):
- register definition file (stm32f10x.h)
- system files (system_stm32f10x.c and system_stm32f10x.h)
- configuration file (stm32f10x_conf.h)
- interrupt handlers (stm32f10x_it.c and stm32f10x_it.h)
- startup code (startup_stm32f10x_md.s)
- linker file (stm32_flash.ld)
- main function / main file (main.c)
- makefile
Finally, we also need some modules from the Standard Peripheral Library (misc.c, stm32f10x_rcc.c and stm32f10x_gpio.c) for this sample project.
Extract the Standard Peripheral Library that you did download to StdPeriphLib in the GCCDevelopment folder. This folder also will include the Blinky project. Here are all files that you must copy from the Standard Peripheral Library folder to our new Blinky project folder. Except for main.c and makefile (see below).

After copying all these files to your Blinky folder, it should look something like this:
 Image: Blinky folder
Here is a short description of the files deserved by Blinky.
The register definition file (stm32f10x.h)
This file contains all the peripheral register’s definitions, bits definitions and memory mapping for STM32F10x devices. it also contains a configuration section that allows to select the device used in the target application.
It is unique to the project and the device, therefore it is recomended to create a local copy of it in the project folder and to adjust it to reflect our target device.
The configuration file (stm32f10x_conf.h)
This file is used for peripheral header inclusion. Just add it to your project folder and leave it untouched.
The interrupt handlers (stm32f10x_it.c and stm32f10x_it.h)
The Cortex-M3 provides a feature-packed exception architecture that supports a number of system exceptions and external interrupts. Exceptions are numbered 1–15 for system exceptions and 16 and above for external interrupt inputs. The stm32f10x_it.c and stm32f10x_it.h files provides template for all exceptions handler and peripherals interrupt service routine.
You can leave these files untouched.
The startup code (startup_stm32f10x_md.s)
All CPU- and board-specific low-level initialization that needs to occur before entering the main() function should be handled. This is done in the startup code.
The startup code that comes with the Standard Peripheral Library is written in assembly language. It is a generic file that you can leave untouched.
The linker file (stm32_flash.ld)
The linker script must match the startup code described above for all the section names and other linker symbols. It cannot be generic, because it must define the specific memory map of the target device, as well as other application-specific information.
This file was developed for your target device, so there is no reason to change it. You can leave this file untouched too.
The main function / main file (main.c)
The main() function initializes Pin 5 of Port B to output and toggles it in the while() loop. You can copy and paste that code snipped to your main.c file.
The makefile
The job of the makefile is to compile and link the project files to a binary file, which can be used then to flash the microcontroller. It defines the build tools (GCC and OBJCOPY), the compiler and linker flags (specific for the STM32 target device) and creates the object files from their C and assembly sources. Finally, the object files are put together to a binary and .elf file.
Just copy and paste that code to your makefile.
Build your project
Switch to your project folder Blinky and type in
You might see this error message:
Compare to the following image:
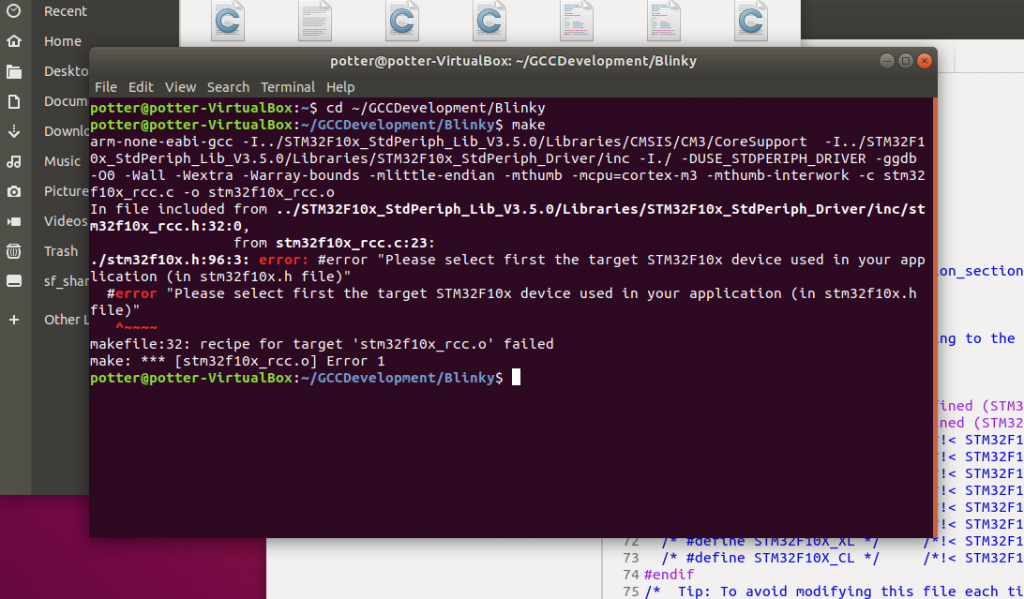 Image: Missing definition in stm32f10x.h
You have to select the target STM32F10x device used in your application first!
The stm32f10x.h header file describes the memory maps and pin definitions for the whole STM32 F1 device family. Depending on your target device I use a medium density device (MD) unmask one of the #defines in lines 66 to 73.
 Image: Select your target device in stm32f10x.h file
and your project should compile and link.
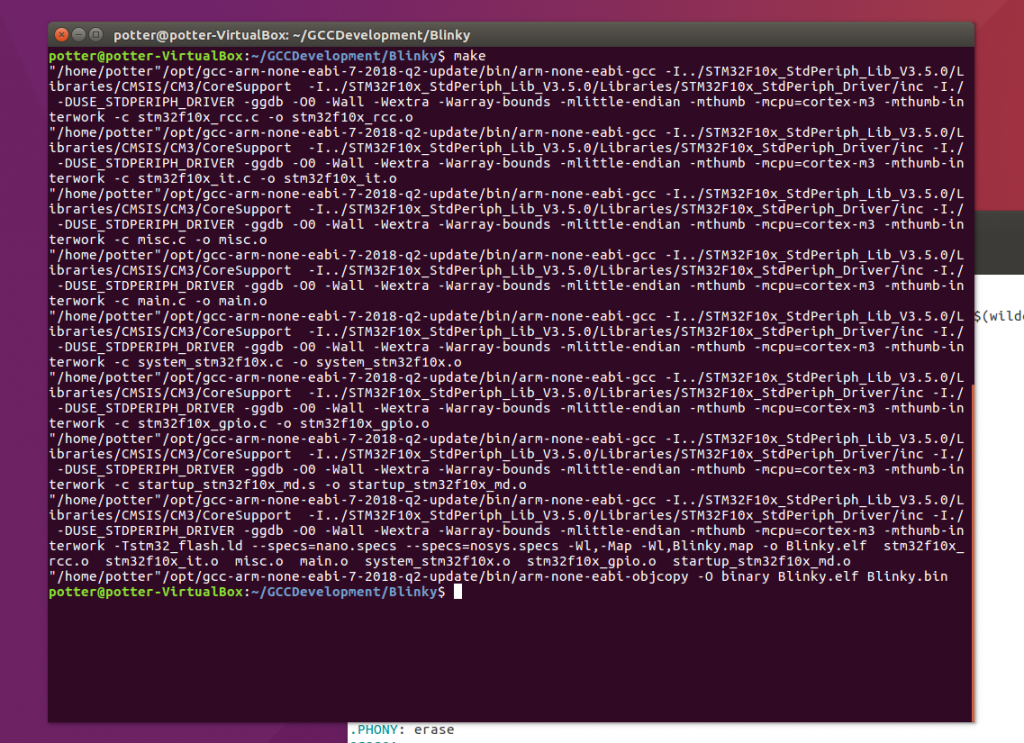 Image: Compiling and linking
Setting up a project for STM32 microcontrollers is not a simple thing. You have to know about a whole lot of files that you must include to your project. You need to configure stm32f10x.h and main.c must be written too. Last but not least, a matching makefile to compile and link your project is required. As a result, binary and .elf files are created which you can use to flash your device.
Flashing your device requires some additional tools: OpenOCD and a JTAG device.
How this is done, I show you in the next part of this tutorial.
Источник: