


Windows 2016 iscsi target
Содержание
- Как подключить iSCSI диск по сети в Windows Server 2016
- Инициализация iSCSI диска в консоли управления дисками Windows Server 2016
- Install and Configure iSCSI Windows Server 2016
- Configure iSCSI Windows Server 2016
Если вы настраиваете отказоустойчивый кластер Windows Server 2016 или вы строите кластер Hyper-V Windows Server 2016, вам понадобится общее хранилище для размещения файлов виртуальных машин, т.к. хранение данных и файлов на локальных дисках не очень хорошо с точки зрения отказоустойчивости кластера. Довольно популярным протоколом для доступа к сетевым хранилищам, который используется сегодня повсюду, является iSCSI (Internet Small Computer System), который позволяет передавать команды SCSI через обычную TCP/IP сеть и разработан для установления взаимодействия и управления системами хранения данных, серверами и клиентами. Давайте рассмотрим, как подключить общее хранилище iSCSI на Windows Server 2016.
Как подключить iSCSI диск по сети в Windows Server 2016
В качестве iSCSI initiator в нашем случае будет использоваться наш сервер Windows Server 2016, а в качестве сетевого хранилища — виртуальное устройство FreeNAS, которое используется как iSCSI target. Необходимо проверить настройки брандмауэра, чтобы исключить все возможные проблемы с блокировкой портов и трафика между устройствами. Как правило, для связи, протокол iSCSI использует 860 и 3260 TCP-порты.
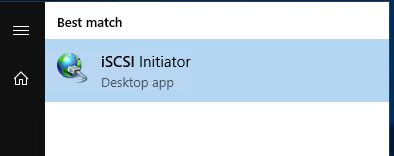
В Windows Server 2016 есть приложение iSCSI initiator, открыть его можно перейдя в окно поиска и набрав iSCSI initiator. Запустить приложение можно так же набрав iscsicpl.exe.
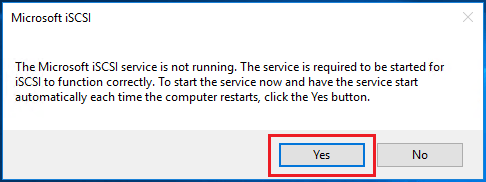
При первом запуске iSCSI initiator появится диалоговое окно с информацией о том, что служба Microsoft iSCSI не запущена. Если вы нажмете Yes, то служба запустится и, в дальнейшем, будет запускаться автоматически.
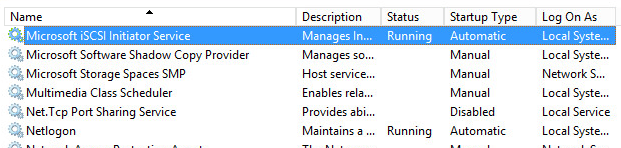
После нажатия в диалоговом окне кнопки Yes запустится служба Microsoft iSCSI Initiator Service, это можно увидеть, открыв консоль управления службами (services.msc), а тип ее запуска изменился на Automatic.
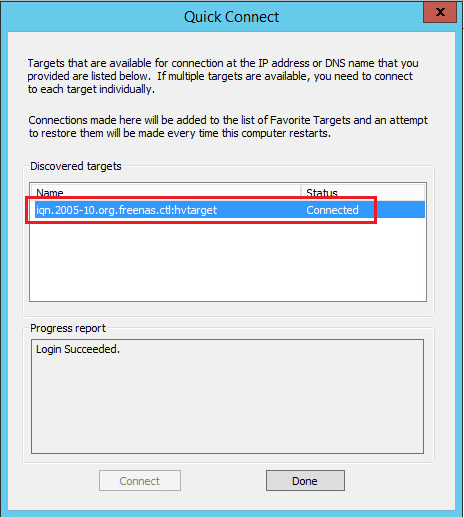
Теперь, когда у нас открыто диалоговое окно свойств iSCSI инициатора, мы можем указать IP-адрес нашего хранилища iSCSI Target. В нашем случае особых настроек для FreeNAS target не потребуется, поэтому нужно только указать его IP адрес и нажать на кнопку Quick Connect. В результате вы автоматически подключитесь к iSCSI target.
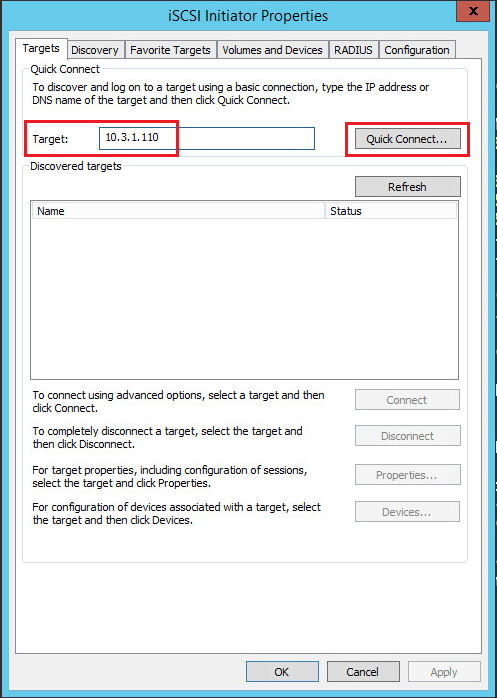
Обратите внимание, что при нажатии кнопки Quick Connect можно увидеть статус подключения и target name, которая совпадает с настройками target в FreeNAS.
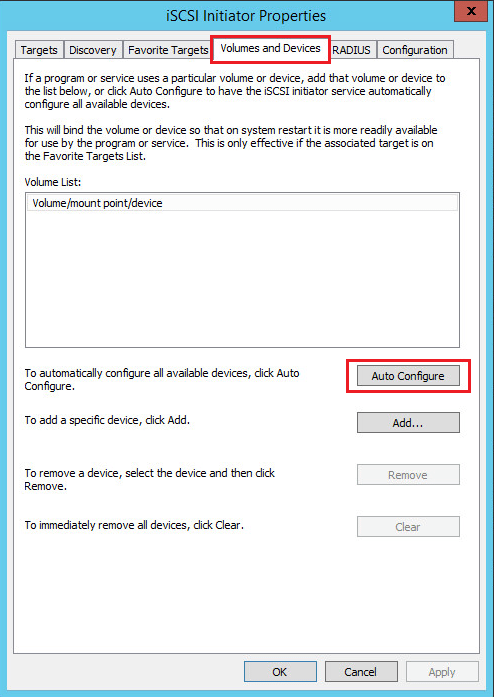
Затем вам нужно щелкнуть по вкладке Volumes and Devices, чтобы настроить том iSCSI. Здесь также необходимо выбрать параметр Auto Configure, после этого будут автоматически добавлены и настроены все доступные устройства.
Теперь можно увидеть, что iSCSI диск подключен.

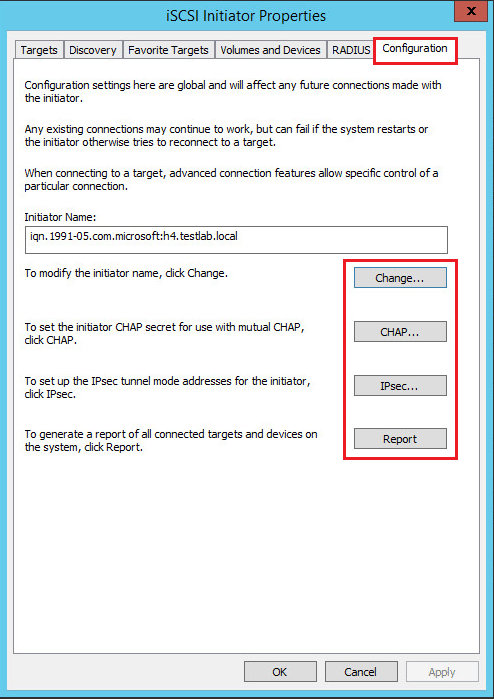
Если необходимо поменять определенные параметры или значения в конфигурации подключения iSCSI, их можно настроить, перейдя на вкладку Configuration. К ним относятся учетные данные CHAP, настройки IPsec и т.д. Вы также можете формировать отчеты о подключенных объектах и устройствах, а также изменять имя инициатора на вкладке Configuration.
Инициализация iSCSI диска в консоли управления дисками Windows Server 2016
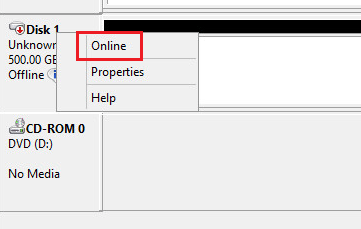
Нам осталось сделать ещё кое-что. Необходимо добавить дисковый раздел в Windows Server 2016 в консоли управления дисками (Disk Management), чтобы этот раздел мог использоваться в системе . Обратите внимание, что после повторного сканирования подключенных устройств хранения появился ещё один диск (с индексом Disk1). Изначально после добавления он находится в статусе Offline.
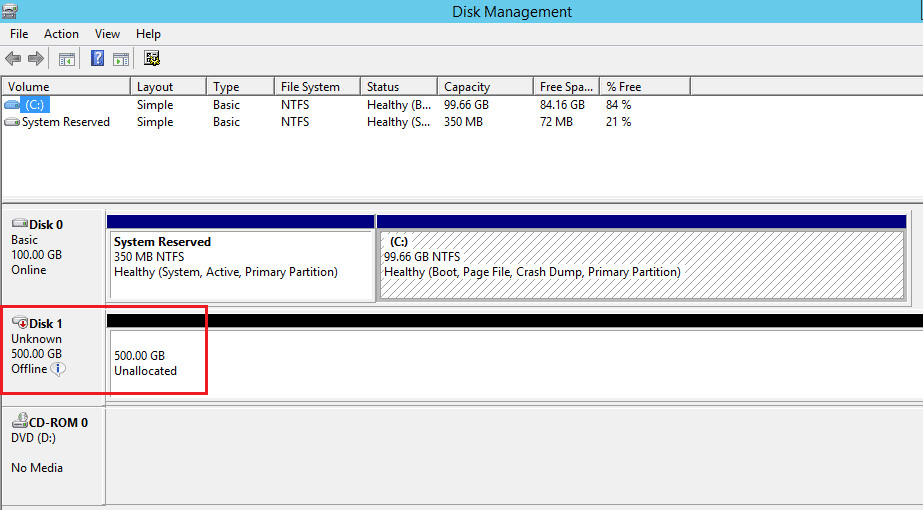
Щелкните правой кнопкой мыши по новому тому с неразмеченной областью) и выберите пункт меню Online. После этого диск станет активным.
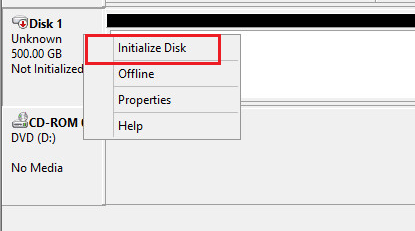
Затем нам нужно инициализировать диск. Для этого снова щелкните правой кнопкой мыши и выберите пункт Initialize Disk.
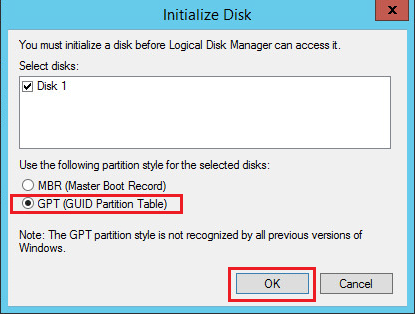
Далее в появившемся окне Initialize disk нужно выбрать таблицу разделов, MBR или GPT. Если вам нужна поддержка больших дисков (более 2 Тб), выберите пункт GPT.
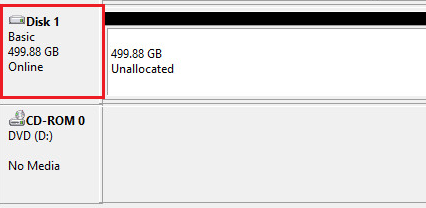
Итак, мы добавили новый диск, который был отформатирован и теперь готов к работе.
Процесс добавления общего хранилища iSCSI в Windows Server 2016 очень прост. После того, как было организовано соединение между initiator и iSCSI- target, нам необходимо выполнить определенные настройки в графическом интерфейсе. Затем, нам остается добавить новый том в консоли управления дисками (Disk management) в Windows, после чего сетевое дисковое хранилище можно использовать.
In this post I’m going to show the steps to install and configure iSCSI Server in Windows Server 2016. iSCSI ( Internet Small Computer System Interface) allows to send SCSI command over LAN or WAN. iSCSI devices are disks, tapes, CDs, and other storage devices on another networked computer that you can connect to. While accessing storage devices using iSCSI, the client will be referred as iSCSI initiator and the storage device will be referred as iSCSI target.
Step – 1 : Configuring Windows Server 2016 as iSCSI Server
The first thing required to configure Windows Server 2016 as a iSCSI Server is to install iSCSI Target Server role on Windows Server 2016. Open the Add Roles and Feature Wizard and choose iSCSI Target Server from the list of Roles under File and Storage Services. Click Install to proceed further.

 Do not choose any option from the feature list. Click on Next on another sl /
Post sucessful installation of iSCSI Target server role. Open Server Manager and Click on File and Storage Services.


Click on iSCSI. To share storage, the first thing is to create an iSCSI LUN. iSCSI virtual disk is backed by a VHD. Click on “To create an iSCSI virtual disk, start the New iSCSI Virtual Disk Wizard” 
Select the Server and the volume. Click on Next.
Specify the iSCSI virtual disk name and click Next.

Before adding iSCSI connecting initiator to the list configure iSCSI initiators to connect to this iSCSI Server.
Click on Add iSCSI initiator. You can see all the configured iSCSI imitators connecting to this iSCSI Server. Click OK to proceed further.
 Click on Add to add more iSCSI initiator’s to the list of Access servers.
 As we don’t have CHAP authentication configured. Click on Next to proceed.
 Review the setting. Click on Create to finish the setup.


In this post, we covered the steps to configure Windows Server 2016 as an iSCSI Server. I hope this is informative for you. Thanks for Reading. Be social and share it in social media, if you feel worth sharing it
In this article I’m going to show you install and Configure iSCSI windows server 2016. Internet Small Computer System Interface (iSCSI) is a way of connecting storage devices over a network using TCP/IP. It can be used over a local area network (LAN), a wide area network (WAN), or the Internet. iSCSI devices are disks, tapes, CDs, and other storage devices on another networked computer that you can connect to.
In the relationship between your computer and storage device, your computer is called initiator it initiates the connection to the device, which is called target.
Install and Configure iSCSI Windows Server 2016
So, know we are going to install iSCSI target on the Windows Server 2016 that this server has storage device, it means this server going to share storage device, which is called target.
Step 1: In Server Manager, click Manage, and then click Add Role and Feature. The Add Role and Feature Wizard opens, click Next.
Step 2: In Select Installation Type page, ensure that Role-based or Feature-based Installation is selected, and then click Next.
Step 3: In Select destination Server, click File and Storage Services, click File and iSCSI Service, and then Select iSCSI Target Server. Click Next.
Install iSCSI target windows server 2016
Step 4: On the Feature Window, leave the default selection and then click Next. On the Confirm Installation Selection window, check the Restart the destination server automatically if required, and then click Install.
Install and Configure iSCSI windows Server 2016
Step 5: When the installation process has finished, click Close and go for configuring iSCSI in Windows server 2016 in the targeted server.
Configure iSCSI Windows Server 2016
Create iSCSI lUN. To share storage, the first thing to create an iSCSI lun (aka. iSCSI virtual disk) the iSCSI virtual disk is backed by a VHD. To complete iSCSI target server, the configuration goes to Server Manager.
Step 6: On “Server Manager” windows, select “File and Storage Services” tab and then click “iSCSI” tab. Click “to create an iSCSI virtual disk, start the new iSCSI virtual disk wizard”.
Configure iSCSI Windows Server 2016
Step 7: New iSCSI Virtual disk wizard will open. Here, select the server and select the volume and then click next.
Select iSCSI virtual Disk Location
Step 8: On the “Specify iSCSI Virtual Disk name window”, Type name of virtual disk. Here, I give “Virtual iSCSI Disk” and then click next.
Specify iSCSI Virtual Disk name
Step 9: Specify the virtual disk’s size. Choose the disk type, here I have chosen Dynamically expanding. So, that disk space won’t be over utilized, and then click Next.
Specify iSCSI Virtual Disk Size
Step 10: In the “Assign iSCSI target “page, choose “New iSCSI Target” option and then click Next.
New iSCSI Target
Step 11: On the “Specify target name “page, type the name for the new target, and then click Next.
Specify target name
Step 12: Click Next to open Access Server page, as shown in figure.
Specify Access Servers
So, now you start your initiator Server that you want to Share your storage to that Serve. On “Server Manager” click Tools menu, and then click iSCSI Target, when click will give this massage.
Click the Yes button to open “iSCSI initiator Properties”. On the iSCSI initiator properties click Discovery tab, then click Discovery Portal, Enter the IP address or DNS name port number of the portal you want to add.
iSCSI Initiator Properties
Click Advanced to open Advanced Setting window, on the advanced setting, from the “local adapter” select “Microsoft iSCSI initiator” then from the “initiator IP” Select you IP Address, and then click Ok.
Click Ok to close Advanced Setting, then you will see the target portals in the “Discovery” windows.
iSCSI initiator properties
When the target portals added on the iSCSI initiator, click Ok to close iSCSI initiator Properties.
Step 13: Now come to the Target Server that you want to share storage device from this server. Click Add to specify the iSCSI initiator that will access this iSCSI virtual disk.
Specify Access Server
Step 14: Add initiator ID box will open. Select the initiator cache on the target server, click Ok.
Select a Method to identify the initiator
Step 15: you will see the initiator cache on the Specify access server screen, then click Next.
Configure iSCSI Windows Server 2016
Step 16: In the Enable Authentication page, you have option to use CHAP or reverse CAHP for Authenticating iSCSI initiator and iSCSI target. Here, I leave will leave it empty and then Next.
Step 17: On the “Confirm Selectin” page, click Create to create a new virtual disk or LUN.
Step 18: When the Creating process has finished, click Close to the View Result window.
Configure iSCSI Windows Server 2016
After the Installation you can view the virtual disk in iSCSI tab.
Configure iSCSI Windows Server 2016
When the configuring iSCSI storage has finished, after that you should configure iSCSI initiator on the initiates server. So, now we are going to configure iSCSI initiator, to configure iSCSI initiator follow these process.
Step 19: To connect File Server nodes to iSCSI target open Server Manager, click Tools and select iSCSI Initiator, then proceed with the configuration as per the below screenshots.
Configure iSCSI initiator server 2016
Step 20: On the Target tab, from the Discovery targets part, click Refresh, to connect using advanced option, select a target and then click connect.
On the Connect to Target window, select the add this connection to the list of Favorite Targets, and then click Advanced.
Connect to Target
On the Advanced Setting windows, in the “Correct using” part, from the local adapter, select “Microsoft iSCSI Initiator” and from initiator IP, Select initiator IP, and from the Target Portal IP, Select the target IP address.
Step 21: Then Click Ok to close the Advanced Setting. On the iSCSI initiator Properties, click “Favorite Target” then click “Refresh” to find the favorite target.

Step 22: In the iSCSI initiator Properties window, click “Volumes and Devices” to automatically configure all available device, click Auto Configure.
Volume and Devices
Step 23: When the iSCSI initiator is finished, click Ok to close the iSCSI initiator Properties. So, now open “Disk Management” to make sure that the disk is presented correctly.

Step 24: to Create New volume, right click in the left hand corner, click Online.
Step 25: When you online now again right click on that partition, click Initialize Disk.
Step 26: When you initialize disk, it will help you to create new volume. Right click on that drive, click New Simple Volume, the New Simple Volume wizard will open.
New Simple Volume
Step 27: On the “Welcome to the New Simple Volume Wizard” click Next to continue.
New Simple Volume Wizard
Step 28: On the Specify Volume Size page, choose a volume size, and then click Next to continue.
Specify Volume Size
Step 29: On the Assign Drive Letter or Path page, Select Assign the following drive letter, then select your drive letter, and then click next to continue.
Assign Drive letter or Path
Step 30: On the Format Partition page, choose format this volume with the following settings, and type your volume label, and then click next.
Step 31: you have successfully completed the New simple volume wizard. click finish to create a new partition in the hard disk drive.
Complete the New Simple Volume Wizard
After creating new simple volume, you can see the partition has created on the disk management console.

To make sure that the partition working, go to This PC, you can see your created disk partition.

Shared iSCSI Drive
Conclusion: That’s all about install and configure iSCSI windows server 2016, we had install and configure iSCSI target, then configure iSCSI initiator on the next server, that’s work very well. I hope that was helpful, if have any question you can ask me in the comment bellow.
Источник: