


NodeMCU Examples
Содержание
- NodeMCU Examples tutorial
- How to access pins using lua
- Instructions for uploading lua files
- LED Flash
- Flashing the Built in LED with Lua
- Event driven lua LED blink : NodeMCU Examples
- Find Access Points
- Finding Visible Networks or Access Points
- Explanation of lua string match
- Simple Webserver
- A Simple Webpage Server using ESPlorer
- Webserving the page from nodeMCU reset
- Stopping init.lua
- Webserver Start Count Down
- Find out the nodeMCU IP Address
- Find IP address (New style nodeMCU library)
This page shows you some nodeMCU examples in the lua scripting language. this language is fairly different to the Arduino C/C++ but the great advantage is that you can update individual code sections without re-flashing the whole lot.
It means you don’t wait 60 seconds to update the device, instead it is a matter of seconds. This is the great advantage of scripting languages — development time is vastly reduced.
You will need to update your nodeMCU V3 (ESP8266 based) if you have used the Arduino IDE method (or it has old firmware installed) as the nodeMCU firmware will have been overwritten. It’s not a problem — instructions for re-fashing nodeMCU firmware are here.
If you have not installed or used ESPlorer you will need to Install ESPlorer to follow along with the examples here.
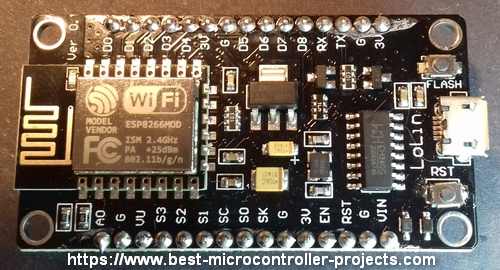
ESP8266 based lolin nodeMCU breakout board
NodeMCU Examples tutorial
How to access pins using lua
The following example shows you how to access pins on an ESP module with commands that are similar to Arduino C code uploading them with ESPlorer. These commands have been tested on a Lolin nodeMCU V3 board.
Save the above as file:led_on.lua
Instructions for uploading lua files
LED Flash
Flashing the Built in LED with Lua
Here’s a program to flash the built in LED. This is the way you would initially think of writing the code in C — non event driven. Even though it works don’t use this in general. You need to think in terms of releasing processing time and not making loops that do not exit (See next example for event driven timer programming).
Save the above as file: led_flash2.lua
Note that the tmr.wdclr() function is used to stop the watchdog reset which is needed it in this function to stop a reset because it is not event driven — See next example for event driven blink.
Event driven lua LED blink : NodeMCU Examples
The previous code example does not use event driven programming so lets write it the way lua should be used using a timer to create an event that will trigger led blink.
Note the lua script below operates for newer lua SDK > 2.1.0. -timer operation.
— NodeMCU Examples
— Event driven programming delayms = 400 LEDpin = 4 LEDstate = 0 gpio.mode ( LEDpin , gpio.OUTPUT ) function tog () if ( LEDstate ) then gpio.write ( LEDpin , gpio.LOW ) print ( 0 ) else gpio.write ( LEDpin , gpio.HIGH ) print ( 1 ) end LEDstate = not LEDstate end
— oo calling method local mytimer = tmr.create () mytimer : register ( delayms , tmr.ALARM_AUTO , function () tog () end ) mytimer : start ()
Save the above as File: led_flash2.lua
The event driver (the timer) is at the end of the code.
First a timer object is created ‘mytimer’. Then the timer is registered with the delay time, the type of repeat — ALARM_AUTO means repeat this timer event forever.
Next is the function tog that is called when the timer triggers. Then the timer is started. You can use ‘mytimer:alarm’ instead of register and start, which both registers and starts the timer if you want.
So in this code the timer repeatedly calls function tog() at the delayms rate which is set to 400ms.
Find Access Points
Finding Visible Networks or Access Points
This script lets you see local network names (ssid) and other related information. It also shows the signal strength of any local network, which can be useful to check whether you have got a dead zone nearby in your own Wifi setup.
— NodeMCU Examples — Get Access Point data station_cfg = < ssid = "SSID" , pwd = "password" >station_cfg.save = true wifi.sta.config ( station_cfg ) — https://github.com/nodemcu/nodemcu-firmware/blob/master/docs/en/modules/wifi.md — Print AP list that is easier to read function listap ( t ) — (SSID : Authmode, RSSI, BSSID, Channel) print ( "\n" .. string.rep ( " " , 32 — 4 ).. "SSID\t\t\t\t BSSID\t RSSI\t\tAUTHMODE\tCHANNEL" ) for bssid , v in pairs ( t ) do local ssid , rssi , authmode , channel = string.match ( v , "([^,]+),([^,]+),([^,]+),([^,]*)" ) print ( string.format ( "%32s" , ssid ).. "\t" .. bssid .. "\t " .. rssi .. "\t\t" .. authmode .. "\t\t\t" .. channel ) end print ( "———" ) for bssid , v in pairs ( t ) do print ( bssid , v ) end end

wifi.sta.getap ( 1 ,listap )
Save the file as wifi_getap.lua.
The data returned from the getap() function is a table that has 2 columns of data. This is the raw data with BSSI on the left and all the other data on the right:
Explanation of lua string match
One of the interesting things about lua is that functions can return multiple values. The following string match returns all the regular expression matches, placing them sequentially into variables ssid, rssi, authmode, channel.
This means you can write very compact code but you will need to understand regexp (if possible!).
This tool is a useful way of testing regexp expressions: http://myregexp.com/
The Caret ‘^’ means NOT in this case so the characters to be found are [^,]+ anything that is not a comma. The plus means at least one match must be found.
Adding parenthesis and a trailing comma ([^,]+), means the next character must be a comma. The parenthesis tell the function to return the contents as a matching string.
So the first match finds the first element on the right column of data (and ignores the comma) i.e. the ssid. The next match is the same, and finds the signal strength, and the next match is also the same, finding the authmode.
The last match ([^,]*) . * means grab any or zero matches. Since there is no comma ^, it matches the rest of the remaining characters assigning them to channel.
Simple Webserver
A Simple Webpage Server using ESPlorer
Set SSID and PASSWORD to your WiFi name and password.
Save the above text as simple_webserver.lua.
Now go to your router and find out the IP address assigned to the ESP module (or use some more lua code shown as another example below to do this) and then go to a browser and type that IP into the URL bar and you should see something like this (the IP address will be different for your system):
Served as a webpage.
Note: To stop the webserver as a program instruction rather than a hard reset use the lua code:
Webserving the page from nodeMCU reset
To make the nodeMCU serve the page from reset you need to put the function into init.lua however if you put the existing file into init.lua you won’t be able to flash it with a different program — the file will immediately execute and you won’t be able to re-program the ESP module from the ESPLorer interface. Instead you would have to re-flash the chip with the original firmware.
To get round this you need to delay the start of the function execution. This is done by using a timer that delays for 6 seconds before starting. This gives you time to send the command tmr.stop() so it never gets to the execute the function. you can find a convenient button for this in the command tab in ESPlorer.
The timer command required is:
So save the above code as init.lua
Now press the rest button on the ESP module and refresh the browser — page will not be found. wait >10 secs and refresh to see the page. It will also refresh when the ESP module wakes up anyway as it is in keep-alive mode.
Now try getting back control of the ESP module — by resetting and the issuing the command tmr.stop()
You can probably see that you could read a button input and change the output data sent to a served page using gpio.read(pin) and taking action on the result. This would be the basis of making a webpage indicate data from the ESP module e.g. from a sensor or a button press etc.
Stopping init.lua
The other way to stop the action of init.lua is to remove the file using the command:
Webserver Start Count Down
This script does the same job as the last one except that it shows you how long you have until the webserver starts. A countdown is output to the serial monitor.
Save the above file as init.lua overwriting the previous file.
Find out the nodeMCU IP Address
Find IP address (New style nodeMCU library)
The following lua script runs the previous webserver script to start a connection. It the waits until an IP address is found and prints it out. Note how the timer object is using an object oriented method to create it and unregister it.
There are 7 timers in the ESP8266 nodeMCU implementation numbered 0 to 6. In the old code above you have to choose which number to use — that means you had to keep track of the numbers and could lead to assignment errors.
In the new code below there are no numbers — the next timer just gets assigned. Also these seem to be software timers so there are more than 7. Try creating more than 7 timer objects and see.
— NodeMCU Examples
— Find assigned IP address. — — A timer is initiated to regularly check if the ip — has changed from nil — if it has then the — ip address is displayed and the timer is stopped — and freed for other use. — — oo timer method dofile ( "simple_webserver.lua" ) local ipTimer = tmr.create () ipTimer : alarm ( 1000 , 1 , function () check () end )
function check () if wifi.sta.getip () == nil then print ( "Connecting to AP. " ) else print ( "IP: " , wifi.sta.getip ()) ipTimer : unregister () end end
Save the file as find_ap.lua
This the typical output (yours will be different)
The left value is the assigned IP, followed by the netmask, and gateway IP.
Источник: