


Set static IP on CentOS 7

Previously, you learned how to set IP static on Ubuntu, in this article you will review how to set static IP on CentOS 7. By default on CentOS 7 Linux and other distributions, network settings are set to automatically receive IP from DHCP. But in general, you need to make adjustments if you are setting up a server or need fixed IP in certain situations. In this tutorial, in addition to setting the static IP on CentOS 7, we will learn how the nmtui command works.
Table of Contents
How to set static IP on CentOS 7
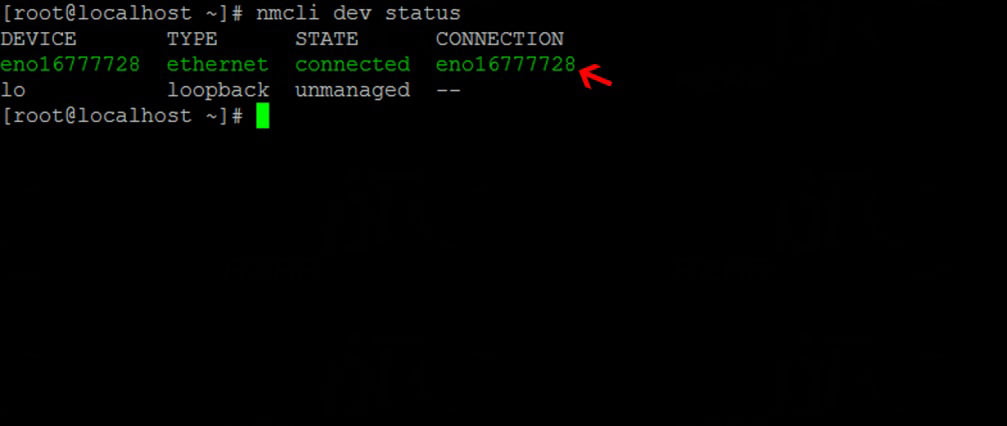
1- First, by entering the following command, we check the status of the network card.
After entering the following command, you will be informed whether your network card is active or inactive.
2- Enter the following command to display the name of your interfaces.
The interface name is important in subsequent commands in setting static IP.
The photo above shows that our interface name is eno16777728.
Two ways to set up static IP on CentOS 7.
1- Setting static IP by terminal environment commands.
2- Setting static IP by Network Manager.
Setting static IP on CentOS 7 by terminal environment commands
1- First, go to /etc/sysconfig/network-scripts path.
2- Enter the ls command to find the name of your interface file.
Ifcfg will be added at the beginning of the interface name. For example, our interface file is in ifcfg-eno16777728.
3- Open the interface settings file with the Vi editor.

4- Press the i button and copy the following phrase into it.
Enter your settings in the IPADDR and. Sections.
5- Save the file after entering and setting the desired IP.
To save the file in Vi, first enter the Esc key and enter the phrase :wq and press Enter.
6- After applying the above steps, restart your network service.
7- By entering the following command, you will see the settings that you have made.
At this point, your settings are applied and you can use your Linux operating system network.
Setting the static IP on CentOS 7 by Network Manager
You can set up your network faster by installing the Network Manager package on With CentOS 7. Of course, this package is available by default in CentOS 7, and if not, install it.
1- You can install Network Manager with the following command.
2- Go to your interface editing environment with the following command.
3- In this section, as shown below, you can make the desired settings.
It is mandatory to fill the red arrows sections.
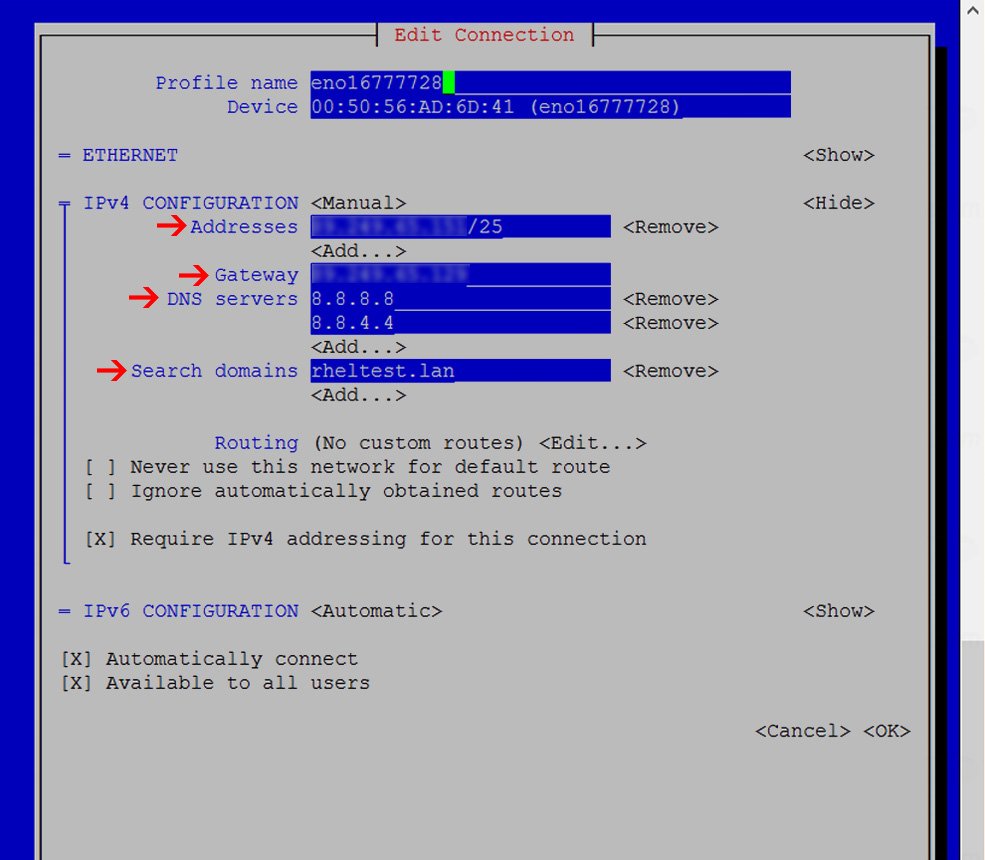
4- After entering the desired settings, enter the OK option at the end.
5- Finally, restart your network service.
Also see
Dear user, we hope you would enjoy this tutorial, you can ask questions about this training in the comments section, or to solve other problems in the field of Eldernode training, refer to the Ask page section and raise your problems in it.
Источник: