


How to Set up & Use NGINX as a Reverse Proxy
Содержание
- Setting Up an Nginx Reverse Proxy
- Step 1: Install Nginx from Default Repositories
- Step 2 (optional): Install Nginx from Official Repository
- Step 3: Start Nginx and Configure to Launch on Reboot
- Step 4: Unlink Default Configuration File
- Step 5: Create New Configuration File
- Step 6: Link and Activate Configuration File
- Step 7: Test and Restart Nginx
- Optional Nginx Configuration Options
- Load Balancing
A standard proxy server works on behalf of clients, often by providing privacy or filtering content. A reverse proxy works on behalf of a server, intercepting traffic and routing it to a separate server.
There are several reasons you might want to install a reverse proxy. One of the main reasons is privacy.
If you have multiple servers, a reverse proxy can help balance loads between servers and improve performance. As a reverse proxy provides a single point of contact for clients, it can centralize logging and report across multiple servers.
Nginx can improve performance by serving static content quickly and passing dynamic content requests to Apache servers.
This guide will help you install and configure an Nginx reverse proxy on your system.

- A Linux server with Apache, PHP, and a firewall
- Access to a root user with sudo access
- Linux command-line or terminal (Ctrl–Alt–T for Ubuntu, Alt–F2 for CentOS)
- Package manager (such as APT)
Setting Up an Nginx Reverse Proxy
Step 1: Install Nginx from Default Repositories
Open a terminal window and enter the following:
Allow the package manager to finish refreshing the software lists, then enter the following:
Allow the process to complete.
Note: This is the easiest way to install Nginx on CentOS or Ubuntu, but it may not load the latest stable release. Move on to Step 2 to add and install from the Nginx software repositories.
Step 2 (optional): Install Nginx from Official Repository
Add Security Key
In a terminal window, enter the following:
This downloads the signing key for Nginx, which verifies that you’re downloading authentic software.
Open sources.list File for Editing
In the terminal, enter the following:
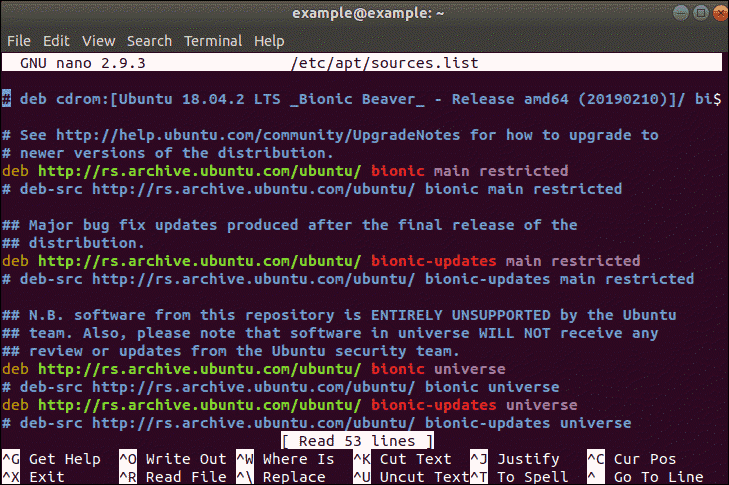
Add Nginx Sources to Repository List
Enter the following lines in the /etc/apt/sources.list file you just opened:
Replace CODENAME with the codename for your distribution of Debian.
Save the file and exit.
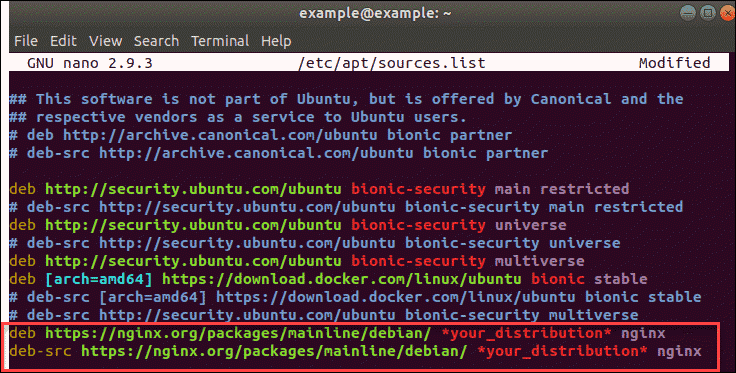
Note: Nginx developers maintain different directories for different Linux distributions. This guide suggests installing the mainline supported release. As with most software, there are more recent but untested packages. See the documentation for the specific package for your distribution.
Install Latest Release of Nginx
To install the latest release of Nginx, use the commands:

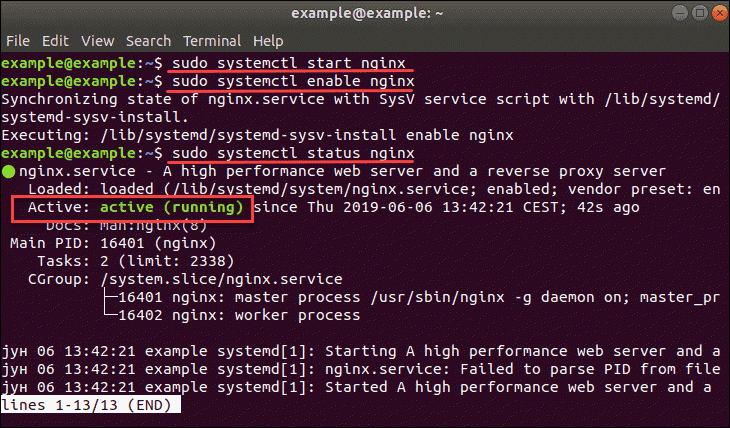
Step 3: Start Nginx and Configure to Launch on Reboot
To enable Nginx:
To check Nginx is running:
The output should show you the service is active (running), as in the image below:
Step 4: Unlink Default Configuration File
In the terminal, enter the following:
Step 5: Create New Configuration File
To create a new configuration file, enter:
Replace custom_server with a name that’s meaningful to you. In the new file, enter:
This is a very basic Nginx reverse proxy example. Nginx is set to listen for all traffic on port 80 for all traffic.
The proxy_pass command directs all traffic on port 80 to http://my_server . Just change http://my_server to the location of your choice, and Nginx will intercept client requests and route them to the location you specify. Once you’ve finished, save the file and exit.
Step 6: Link and Activate Configuration File
To activate the new Nginx file, enter:
As usual, replace custom_server with the name of the configuration file you created in Step 5.
Step 7: Test and Restart Nginx
Optional Nginx Configuration Options
Proxy Buffers
By default, Nginx buffers traffic for servers that it proxies for. Buffers improve server performance as a server response isn’t sent until the client finishes sending a complete response.
To turn the buffer off, open the configuration file from Step 5. Under the location/section, add the following:
Request Headers
Headers provide the server information about the requests made, or about the client.
Nginx redefines two of the header fields: host is configured for $proxy_host , and connection is configured for close . If you use those headers, be sure to change the behavior in the configuration file.
If any header strings are empty, Nginx simply eliminates those fields.
To change the way Nginx handles heathers, use the following commands in your configuration file:
This example tells Nginx to set host to the $host variable.
To prevent a header field from being passed to the proxied server, use an empty string as follows:
Load Balancing
You can use the configuration file to route traffic to several servers. To use this configuration, your configuration file will look similar to this example:
In other words, the HTTP configuration goes outside the server configuration from Step 5.
To create a name for a group of servers, Use the upstream command:
This designation takes two servers – my.server1.com and my.server2.com – and bundles them together. Nginx proxies that group of servers under the name http://server_group . You can rename them anything you’d like.
This example uses the weight command to route three requests to my.server1.com , then 1 request to my.server2.com . This is one option to manually balance client load between servers. Another method is to simply omit any designation, in which Nginx will round-robin the requests evenly among the listed servers.
Note: Learn more about load balancing and how it works.
Now you know how to set up an Nginx reverse proxy.
It’s an excellent tool for a multiple-server environment, creating a unified client experience. It can also be useful for simpler tasks like keeping a single server anonymous.
Additionally, you can also use our Knowledge Base to learn how to deploy NGINX reverse proxy on Docker.
Источник: