


How to use Nginx Proxy Manager
Содержание
- Installing Docker and SQLite
- Install SQLite
- Deploy NPM on Docker
- Accessing NPM UI
- Working with NPM
- NPM Access List
- Provisioning SSL Certs
- Customize Home Page
- Conclusion
The Nginx proxy manager (NPM) is a reverse proxy management system running on Docker. NPM is based on an Nginx server and provides users with a clean, efficient, and beautiful web interface for easier management. The tool is easy to set up and does not require users to know how to work with Nginx servers or SSL certificates. NPM is an open-source tool maintained by developers from around the world. It is well suited for small server environments and private lab environments. This tutorial will focus on showing you how to deploy the Nginx proxy manager:
Installing Docker and SQLite
Nginx Proxy manager runs as a docker container; thus, it requires Docker and docker-compose installed on the server. For the sake of simplicity, I will only illustrate how to install Docker on Ubuntu. Please refer to the Docker documentation for reference on how to set it up on other systems. To install Docker on Ubuntu, start by removing old Docker installations. Skip this if none is available.
Next, install the repository and all the dependencies using the commands:
Add the Docker repository GPG key:
Next, add the stable repository using the echo command as:
Finally, update the repositories and install docker using the commands:
Now run docker and enable on startup:
Install SQLite
The next step is to install the SQLite database that we shall use to run NPM. It is good to note that you can use the MySQL database as well.
Deploy NPM on Docker
To deploy the Nginx Proxy Manager, we need to create a docker-compose file to run Docker and initialize the container. To learn more about the Docker compose file and how it works, consider the resources linked here. I highly recommend you create the docker-compose file in a directory you have full permissions.
Next, add the following lines to the compose file, save and close.
Finally, run the docker-compose command as:
This will deploy the stack from the NPM image specified in the docker-compose file. Creation output:
Accessing NPM UI
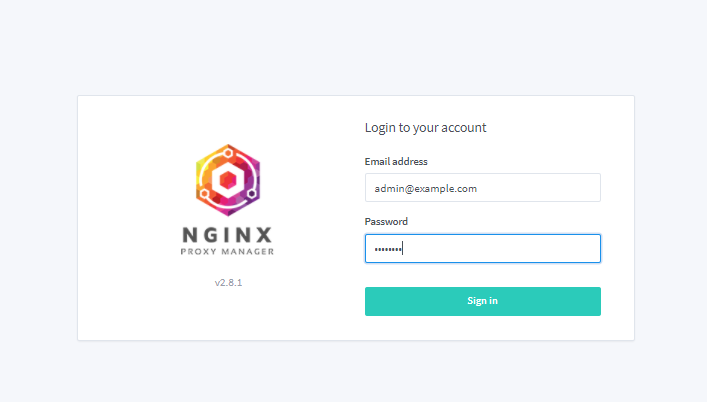
Once created and running, you can log in to the Interface using the IP address and port specified in the docker-compose file. In this case, port 81.
It would be best if you landed on the NPM login UI. Enter the username and password as:
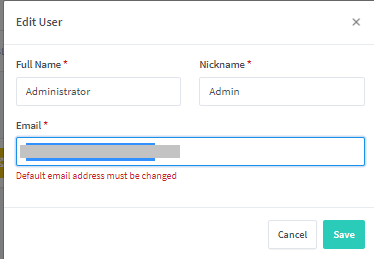
On initial login, you will have to update the administrator details.
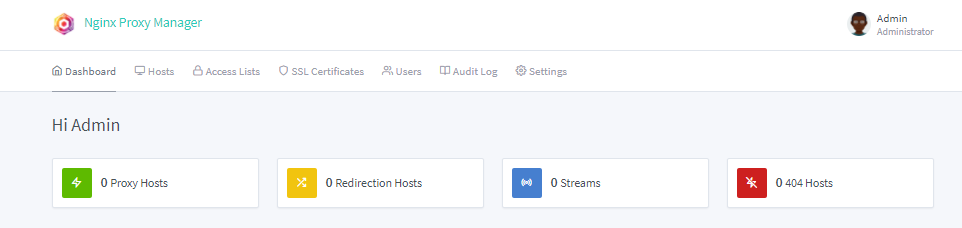
Once you update all the user details, you will get to the main dashboard from where you can configure your proxy hosts:
Working with NPM
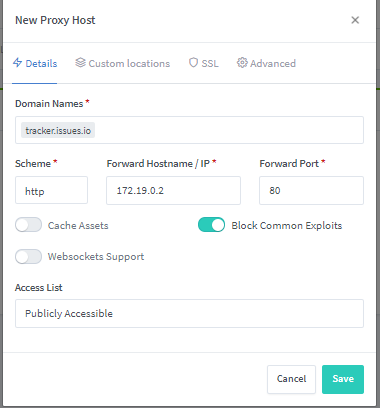
Having installed and ensured that the proxy manager is running, we can add a proxy host to expose a service running on the server. Navigate to Hosts – Proxy Hosts and click on Add Proxy Host.
Select the scheme such as HTTP or HTTPS. If the service you wish to expose does not support HTTPS traffic, stick with HTTP. Next, add the domain names, Forward hostname, and IP. You can also select Block common exploits for added security.
Once you have exposed the service, try to access it using the specified hostname or IP and port. This service should be accessible. You can also manage the proxy in the proxy hosts list.

NPM Access List
In some instances, we may need to expose an application or service on the NPM proxy list to specific IP addresses. To configure this, you can use the NPM Access List.

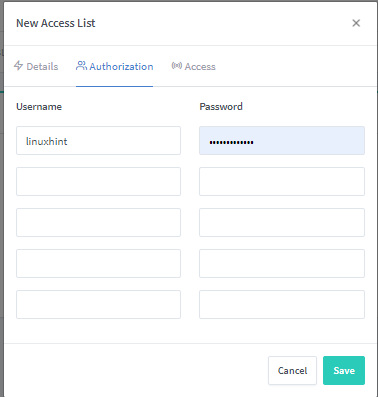
Navigate to Access List and click on Add Proxy List. Here, give them an access list a name; you can also select Satisfy Any.

On the authorization tab, set the usernames and passwords you will use to log in to the service.
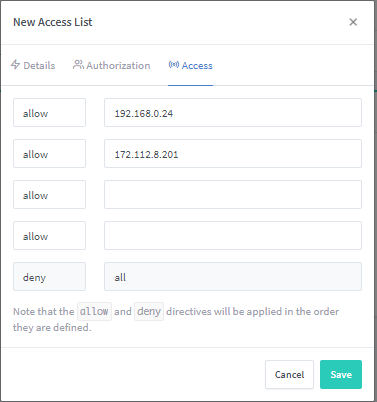
Navigate to the Access Tab and add the IP addresses you wish to allow connections from and deny all others.
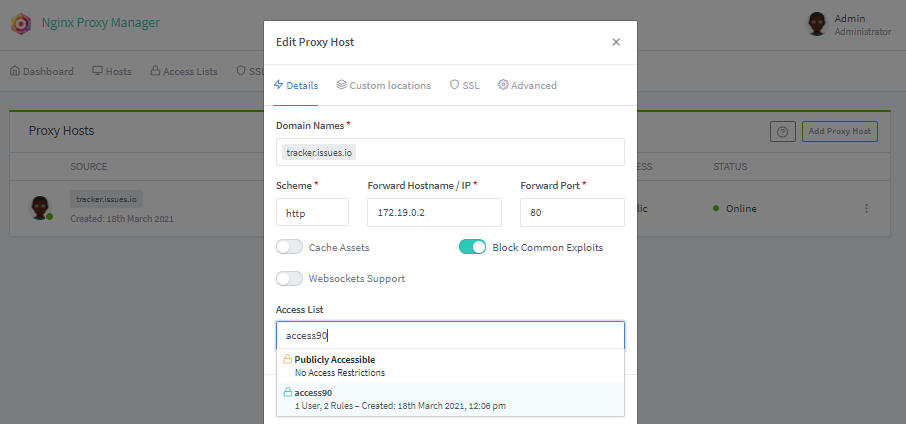
To attach the Access List to a specific web application, navigate to the Hosts – Proxy Host and select your host. Click on Edit and set the access list as defined above.
Provisioning SSL Certs
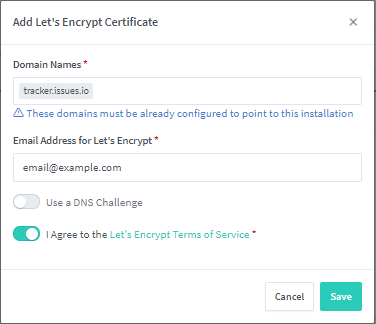
NPM also allows you to provision SSL certificates on various domain names. Before adding a domain name to the SSL provision, ensure that the domain points to the NPM proxy server.
Navigate to SSL certificates, and click on Add SSL certificate. Provide the domain names and the email address for Let’s Encrypt. Finally, Agree to the terms of service and save. You can also add a DNS challenge, but I will not cover that in this tutorial.
This will create a new trusted SSL certificate.
Customize Home Page
You can also customize the default Web page for the NPM server. Click on Settings – Default site and select Edit. You can choose to show a 404 ERROR, Redirect to a new address, or Create a custom page.
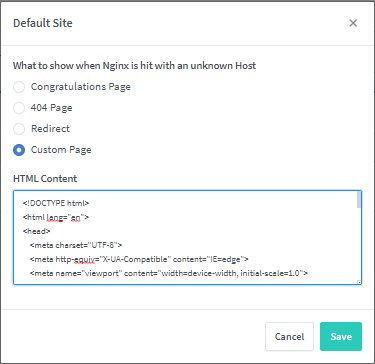
For example, below is a HTML code to show 403 Forbidden.
!DOCTYPE html
html lang = en
head
meta charset = UTF-8
meta http-equiv = X-UA-Compatible content = IE=edge
meta name = viewport content = width=device-width, initial-scale=1.0
title 403 — Forbidden / title / h2
style
$font: ‘Poppins’, sans-serif;
.cage <
position: absolute;
width: 100%;
bottom: 0;
top: 0;
background: repeating-linear-gradient(90deg, transparent, transparent 80px, #6f7376 80px, #181617 100px);
z-index: 2;
animation: close 3s linear;
>
h2 <
position: fixed;
z-index: 1;
font-size: 23em;
color: #000;
margin: auto;
top: 0;
left: 0;
right: 0;
bottom: 0;
margin: 0;
display: flex;
align-items: center;
justify-content: center;
line-height: 0;
z-index: 1;
background-color: #E4E4E1;
background-image: radial-gradient(at top center, rgba(255,255,255,0.03) 0%, rgba(0,0,0,0.03) 100%), linear-gradient(to top, rgba(255,255,255,0.1) 0%, rgba(143,152,157,0.60) 100%);
background-blend-mode: normal, multiply;
>
span <
position: relative;
>
span:after <
content: ‘403’;
position: absolute;
top: 0;
bottom: -96px;
left: 40px;
transform: scaleY(0.6) rotateX(-75deg) skewX(-10deg);
transform-origin: 50% 100%;
opacity: .2;
line-height: 1;
>
@keyframes close <
0% < left: -75%;>
100%< left: 0%>
>
/ style
/ body
/ html
Conclusion
This tutorial has looked at installing and deploying the Nginx Proxy manager on an Ubuntu server running Docker. We then covered how to configure NPM and add hosts to the proxy manager.
Remember: Consistent experimentation is the key to mastery, so experiment away!
About the author

John Otieno
My name is John and am a fellow geek like you. I am passionate about all things computers from Hardware, Operating systems to Programming. My dream is to share my knowledge with the world and help out fellow geeks. Follow my content by subscribing to LinuxHint mailing list
Источник: