


Arduino — LCD
Содержание
- Hardware Required
- About LCD 16×2
- Wiring Diagram
- How To Program For LCD
- Arduino Code
- Video Tutorial
- Custom Character
In this Arduino LCD tutorial, we will learn how to connect an LCD (Liquid Crystal Display) to the Arduino board. LCDs are very popular and widely used in electronics projects for displaying information. There are many types of LCD. This tutorial takes LCD 16×2 (16 columns and 2 rows) as an example. The other LCDs are similar.
※ NOTE THAT:
If you want to simplify the wiring, You can use LCD I2C instead. See LCD I2C tutorial
Hardware Required
About LCD 16×2
Pinout
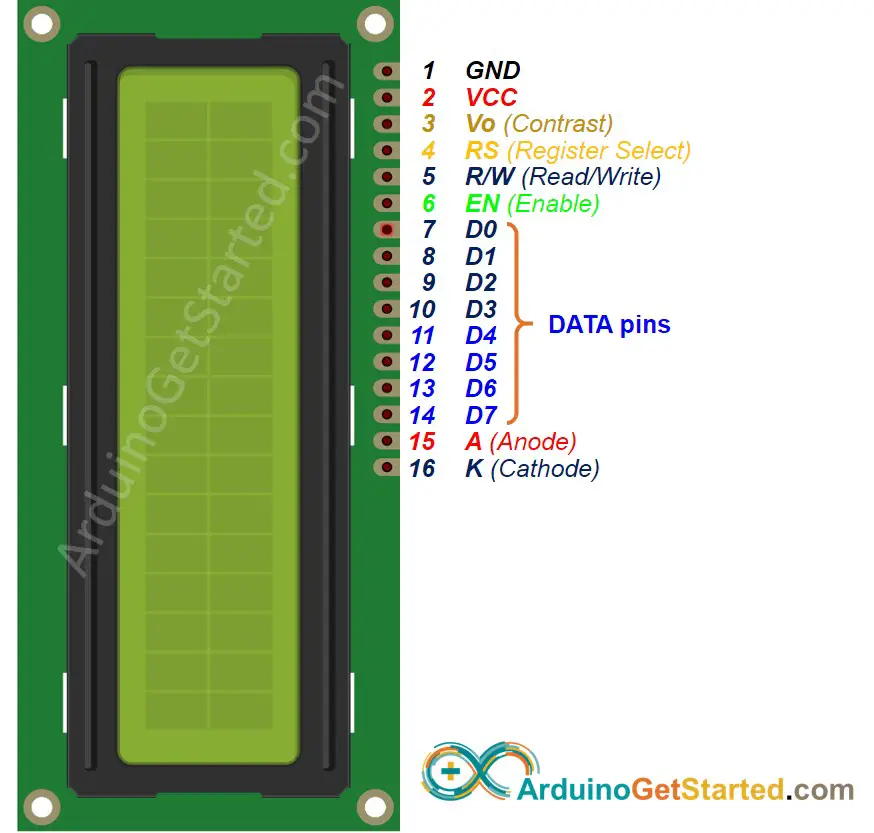
LCD has up to 16 pins. In the most common uses, we do NOT use all pins.
With the support of LiquidCrystal library, we even can use LCD WITHOUT knowing the meaning of these pins. However, if you are curious or want to know in-depth, let's see these pins and their functionality:
4-bit mode and 8-bit mode
8-bit mode is faster than the 4-bit mode, but use more pins than 4-bit mode. The mode selection is performed at the initialization process by sending a command to LCD.
This tutorial uses 4-bit mode, which is the most common-used.
In this mode, LCD's pins:
LCD pin table in 4-bit mode
| LCD PIN | CONNECTED TO | |
|---|---|---|
| 01 | GND | GND |
| 02 | VCC | 5V |
| 03 | Vo | 5V or potentiometer's pin |
| 04 | RS | An Arduino's pin |
| 05 | R/W | GND |
| 06 | EN | An Arduino's pin |
| 07 | D0 | NOT connected |
| 08 | D1 | NOT connected |
| 09 | D2 | NOT connected |
| 10 | D3 | NOT connected |
| 11 | D4 | An Arduino's pin |
| 12 | D5 | An Arduino's pin |
| 13 | D6 | An Arduino's pin |
| 14 | D7 | An Arduino's pin |
| 15 | A | 5V |
| 16 | K | GND |
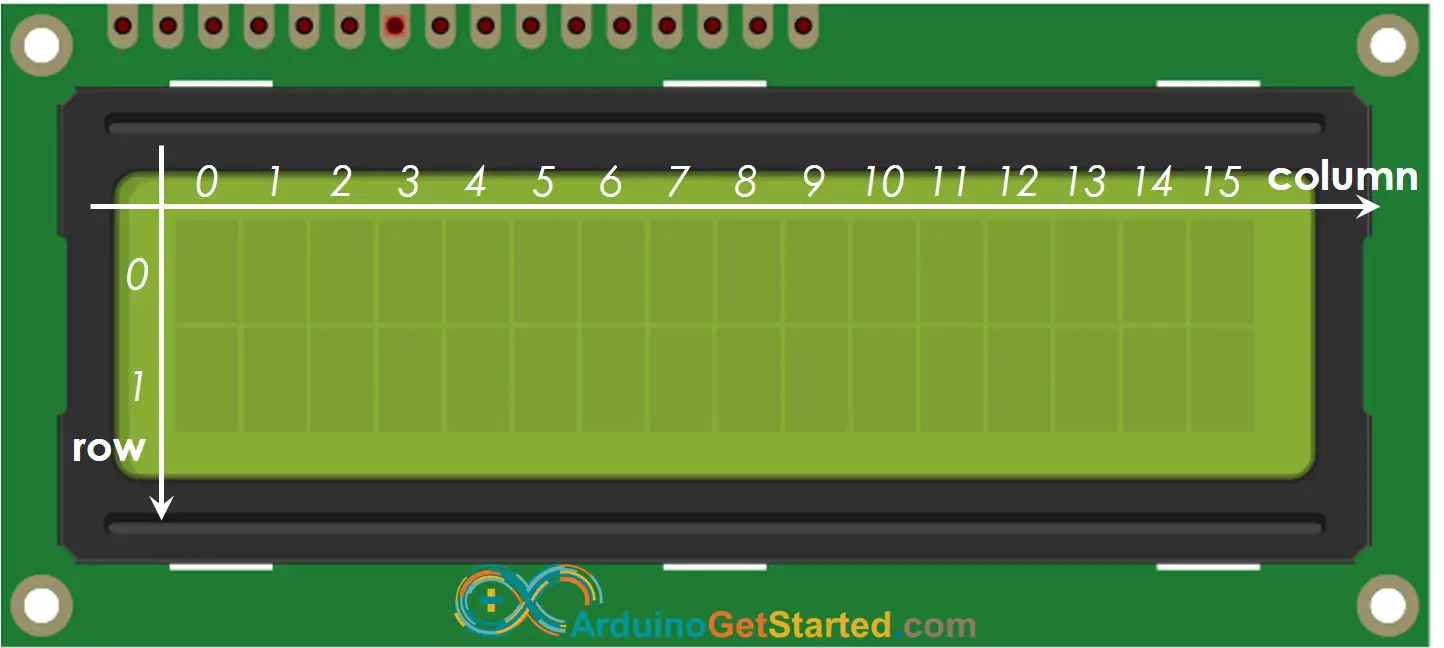
LCD Coordinate
LCD 16×2 includes 16 columns and 2 rows. the conlums and rows are indexed from 0.

How It Works
The process of sending data (to be displayed) to LCD:
The process of sending command (to control) to LCD (e.g, blink LCD, set the cursor to a specific location, clear the display . ):
Arduino — LCD
Controlling LCD is a quite complicated task. Fortunately, thanks to the LiquidCrystal library, this library simplifies the process of controlling LCD for you so you don't need to know the low-level instructions. You just need to connect Arduino to LCD and use the functions of the library. The using LCD is a piece of cake.
Wiring Diagram
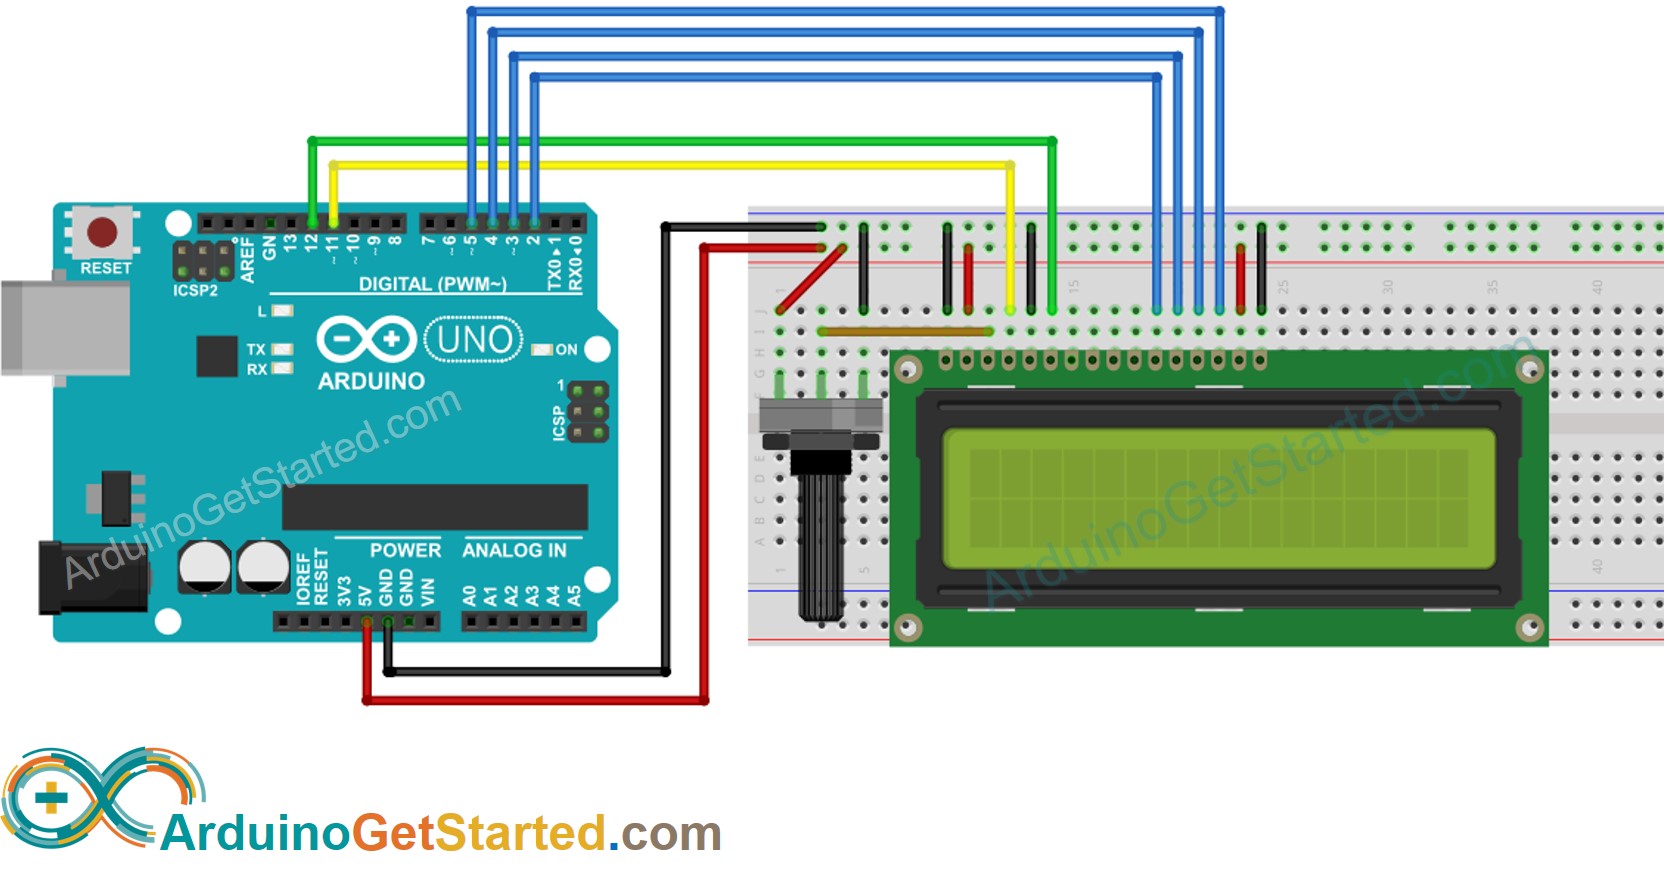
Image is developed using Fritzing. Click to enlarge image
How To Program For LCD
One of the advantages of the library is that Arduino's pin connected to LCD is settable. This makes it flexible when you connect Arduino with LCD and other sensors/actuators.
There are many things more that we can do with LCD (see Do More with LCD part)
※ NOTE THAT:
You can choose any six pins of Arduino to connect to LCD, as long as you specify the connected pin in the Arduino code.
Arduino Code
Quick Steps

Video Tutorial
We are considering to make the video tutorials. If you think the video tutorials are essential, please subscribe to our YouTube channel to give us motivation for making the videos.
Custom Character
lcd. print () function supports only ASCII characters. If you want to display a special character or symbol (e.g. heart, angry bird), you need to use the below character generator.
LCD 16×2 can display 32 characters (2 rows and 16 columns). Each character is composed of 40 pixels (8 rows and 5 columns).
![]()
The character generator represents a character (40 pixels). You just need to do the following steps:
Источник: