


Arduino FreeRTOS Tutorial — How to use FreeRTOS to Multi-tasking in Arduino
Содержание
- How does RTOS work
- What is FreeRTOS
- Quick Start with FreeRTOS For Arduino
- FreeRTOS Arduino Examples
- FreeRTOS in Cpp For Arduino
One of the most important components of today’s embedded systems is the RTOS also known as Real-Time Operating System, which is responsible for everything from task scheduling to performing applications.
RTOS is designed to provide a predictable execution mode. When the processing must meet the time limit of the system, RTOS is used. Therefore, compared with GPOS (General Purpose Operating System), RTOS is usually light in weight and small in size, and generally only provides functions required to run specific types of applications on specific hardware. In some cases, developers can modify the existing RTOS, narrow it down to only provide the functionality required by a specific application, and/or customize its functionality or performance characteristics.
How does RTOS work
The kernel is the core component in the operating system. Operating systems like Linux use a kernel, allowing users to appear to access the computer at the same time. Each program being executed is a task (or thread) under the control of the operating system. If an operating system can perform multiple tasks in this way, it can be said to be multitasking.
Traditional processors can only execute one task at a time, but a multitasking operating system can make each task appear to be executed simultaneously by quickly switching between tasks. The following figure shows the relationship between the execution mode of three tasks and time.
The scheduler is the part of the kernel that is responsible for deciding which task to execute at any particular time. The kernel can pause and resume a task multiple times during the life cycle of the task.
A scheduling strategy is an algorithm used by the scheduler to decide which task to perform at any point in time. A (non-real-time) multi-user system strategy is likely to give each task a "fair" proportion of processor time.
In addition to being involuntarily suspended by the kernel, a task can also choose to suspend itself. If it wants to delay (sleep) for a period of time, or wait (block) for a resource to be available (such as a serial port) or an event (such as a key press), it will do so.
What is FreeRTOS
FreeRTOS is a class of RTOS that is designed to be small enough to run on a microcontroller – although its use is not limited to microcontroller applications. FreeRTOS includes a kernel and a growing set of software libraries suitable for use across industry sectors and applications. With the help of FreeRTOS, you can do multitasking on a microcontroller based hardware!

For Arduino compatibility, we have ported FreeRTOS into the Arduino framework so that you are able to use FreeRTOS with your favorite Arduino boards with ease!
In 2017, Amazon has taken the stewardship of FreeRTOS which makes it reliable and secure to the embedded world.
Quick Start with FreeRTOS For Arduino
Installing the FreeRTOS Arduino Libraries
Visit the Seeed_Arduino_FreeRTOS repositories and download the entire repo to your local drive.
Now, the Seeed_Arduino_FreeRTOS library can be installed to the Arduino IDE. Open the Arduino IDE, and click sketch — Include Library — Add .ZIP Library , and choose the Seeed_Arduino_FreeRTOS file that you’ve have just downloaded.

This library ports the latest FreeRTOS(10.2.1) and allow you to create FreeRTOS Projects in the in Arduino IDE.
Supported Boards
The Seeed_Arduino_FreeRTOS supports all the SAMD boards by Seeed:
FreeRTOS Arduino Examples
The FreeRTOS can be very powerful by providing the microcontroller real time scheduling functionality, inter-task communication, timing and synchronization primitives.
To get you started with FreeRTOS easily, here provides some examples for reference. The following examples are built and ran on Wio Terminal.
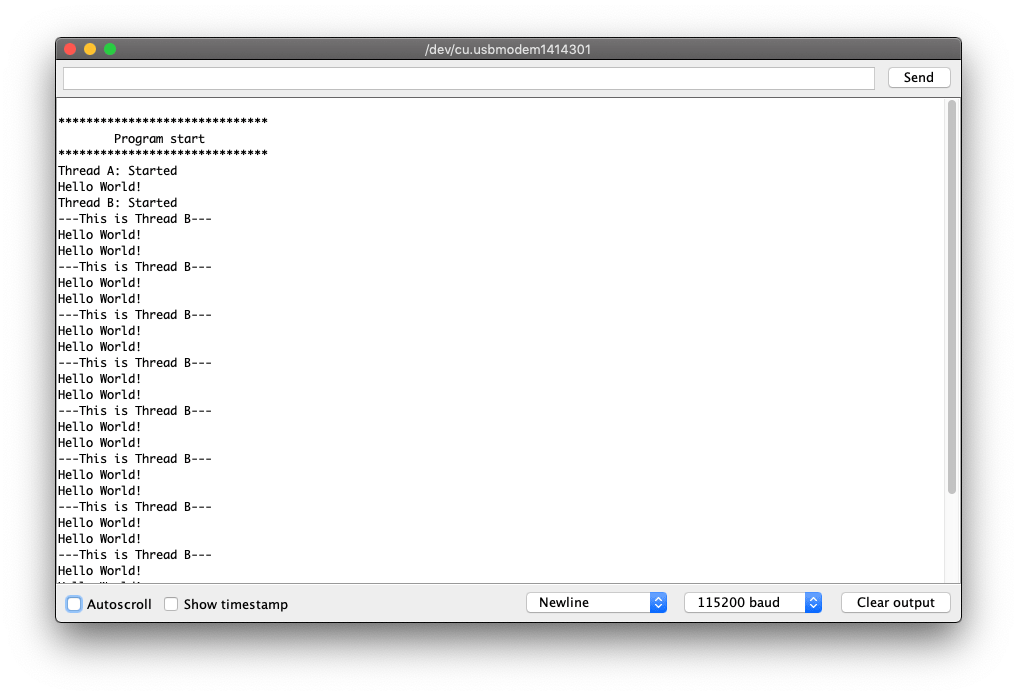
Hello World Example
This example simply creates two threads that prints different strings to the Serial Monitor at a different rate.
Blink Example
This example also creates two threads and output signals to light up LED. One is to simply blink the LED, and the other is to breath LED.
Make sure that the Breathing LED is on a PWM pin.
LCD Example
This example is a demonstrations of FreeRTOS with other Arduino libraries such as LCD Sprites in Wio Terminal. This example creates two sprites in two threads to count number in the opposite way. taskMonitor is a function used to monitor threads and prints stacks info about each thread.
FreeRTOS in Cpp For Arduino
For more, we also provide Seeed_Arduino_ooFreeRTOS, which is a collection of C++ wrappers encapsulating the FreeRTOS functionality, and it’s working under the framework of Arduino.
Installing the FreeRTOS Cpp Arduino Libraries
Visit the Seeed_Arduino_ooFreeRTOS repositories and download the entire repo to your local drive.
Now, the Seeed_Arduino_ooFreeRTOS library can be installed to the Arduino IDE. Open the Arduino IDE, and click sketch — Include Library — Add .ZIP Library , and choose the Seeed_Arduino_ooFreeRTOS file that you’ve have just downloaded.
Источник: